For Models: X1-R, X1, V1-R, V1
Hardware Setup
It is important to have your DynaMount hardware set up properly and in the correct order with each use. This guide outlines the general steps you should follow:
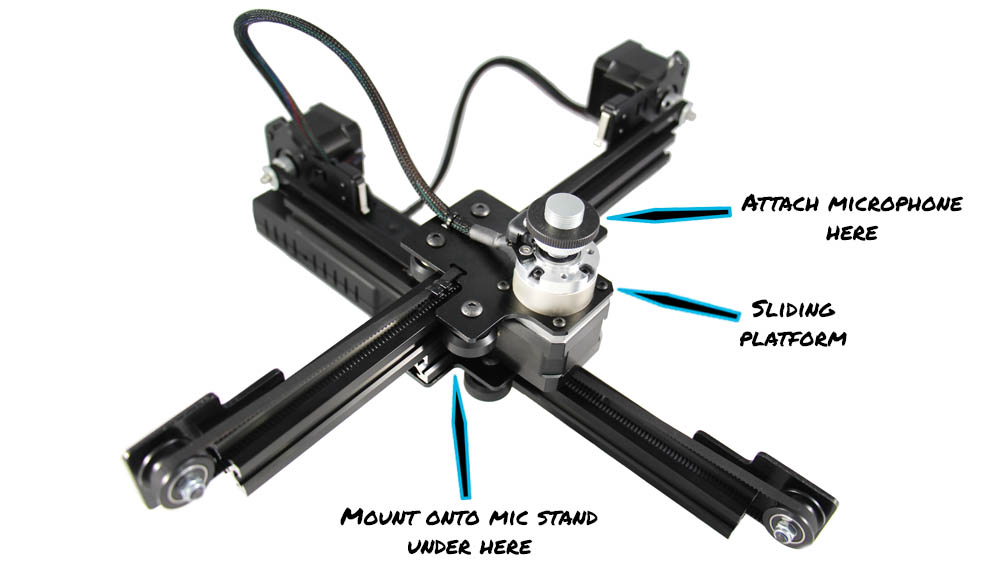
- Get to know your DynaMount…
- WARNING: When powered off, avoid moving the sliding platform(s) or rotating motors by hand. If absolutely necessary, move them very slowly.
- CAUTION: Motors may get hot during use.
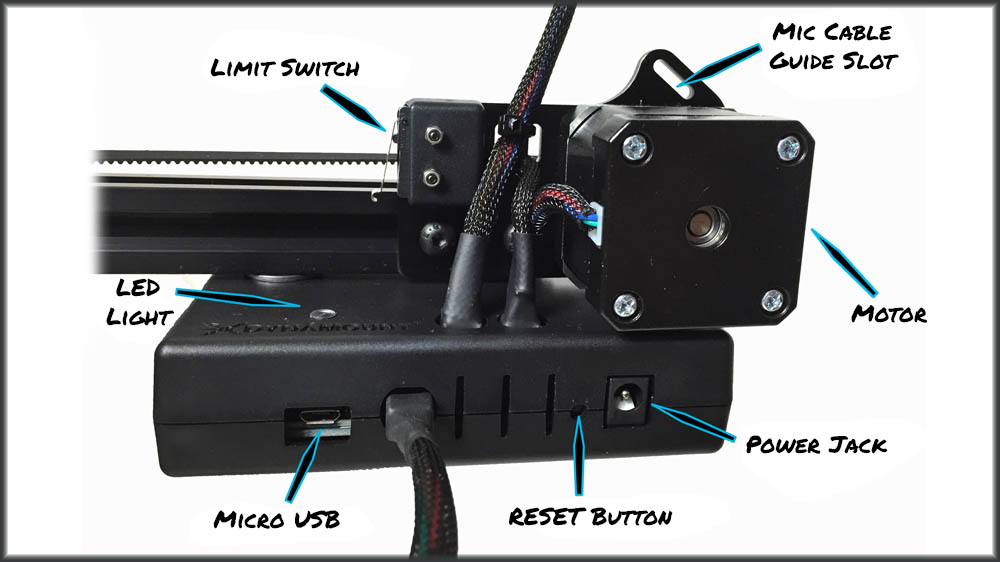
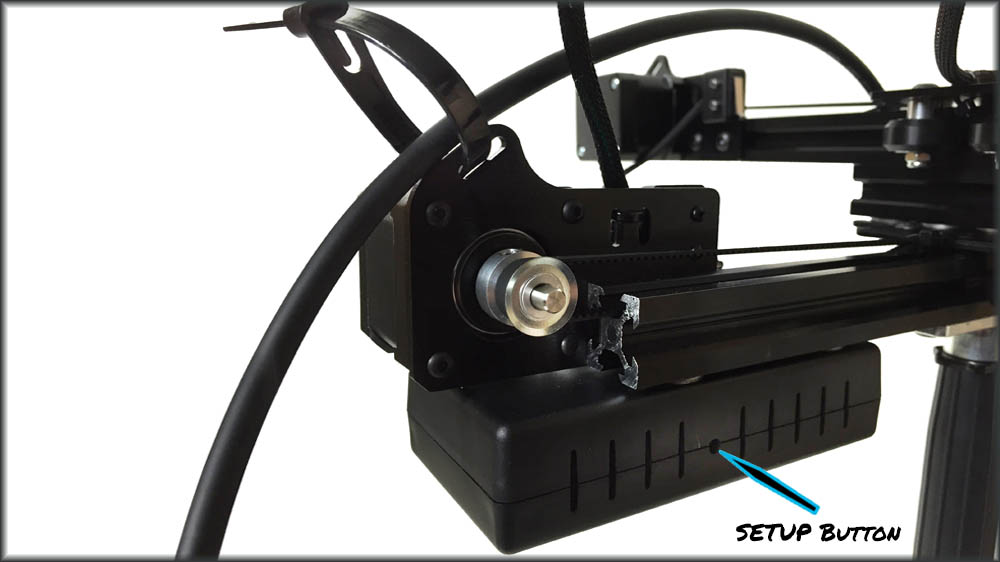
- Take note of how the RESET and SETUP buttons are on opposite sides of the enclosure.
- Securely attach your DynaMount to a sturdy microphone stand.
- If setting up in a level/horizontal orientation, it is recommended to remove the boom arm from your stand and attach the DynaMount directly to the vertical portion.
- If using a smaller stand, it is recommended to place a studio sandbag over the mic stand’s legs. This helps with stability and also prevents the mic stand from drifting very slightly over time on hardwood floors (due to vibrations from the motors).
- Threading your DynaMount onto a mic stand is often made easier by spinning the boom arm of the stand instead of spinning the DynaMount itself.
- Make sure you are using a sturdy, high-quality stand. It is your responsibility to ensure the DynaMount is securely fastened and that the stand will not tip over during use.
- Tips for setting up vertically (or on an incline):

- WARNING: If you have your DynaMount mounted vertically (or on an incline), DO NOT unplug the device without first supporting the weight of the microphone and sliding platform(s) with your hand. When the power is turned off, the motors no longer have any torque and the sliding platform(s) could fall quickly causing damage to your DynaMount or attached microphone. With sliding platform(s) and microphone supported, unplug the device and guide them very slowly down to a relaxed position.
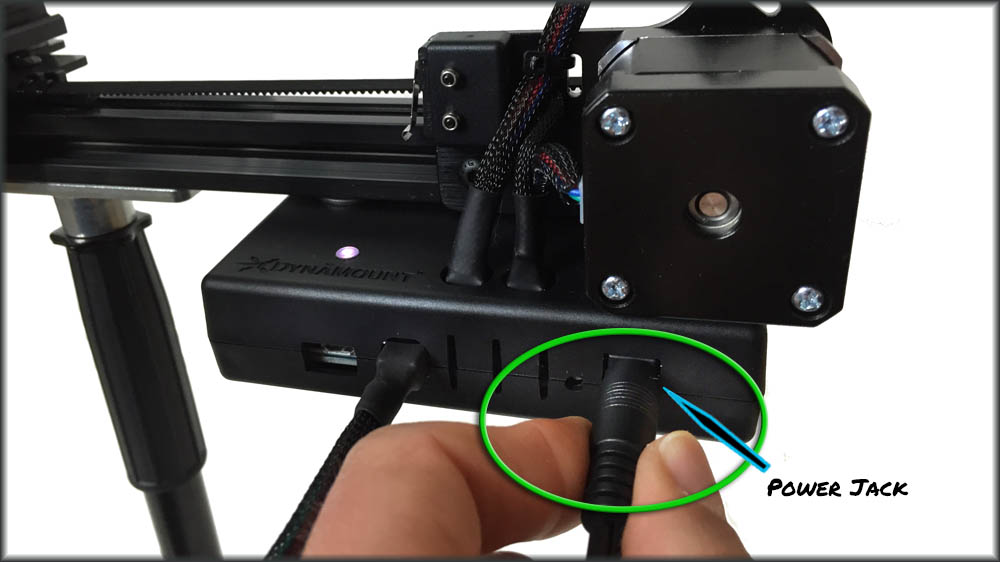
- Plug in the included 12V DC adapter.
- Make sure none of the sliding platform(s) are resting against their limit switches before powering on. This would result in imperfect calibration. If a sliding platform is depressing a limit switch, slowly move the platform slightly by hand so that it is no longer touching the switch, then plug in. NOTE: DynaMounts purchased after March 15, 2016, compensate for this automatically.
- If you have not already completed the Wi-Fi Setup or USB Control process, do so now. Going forward we are assuming that the device is either connected to your Wi-Fi network (“breathing” green LED) or connected over USB (magenta LED).
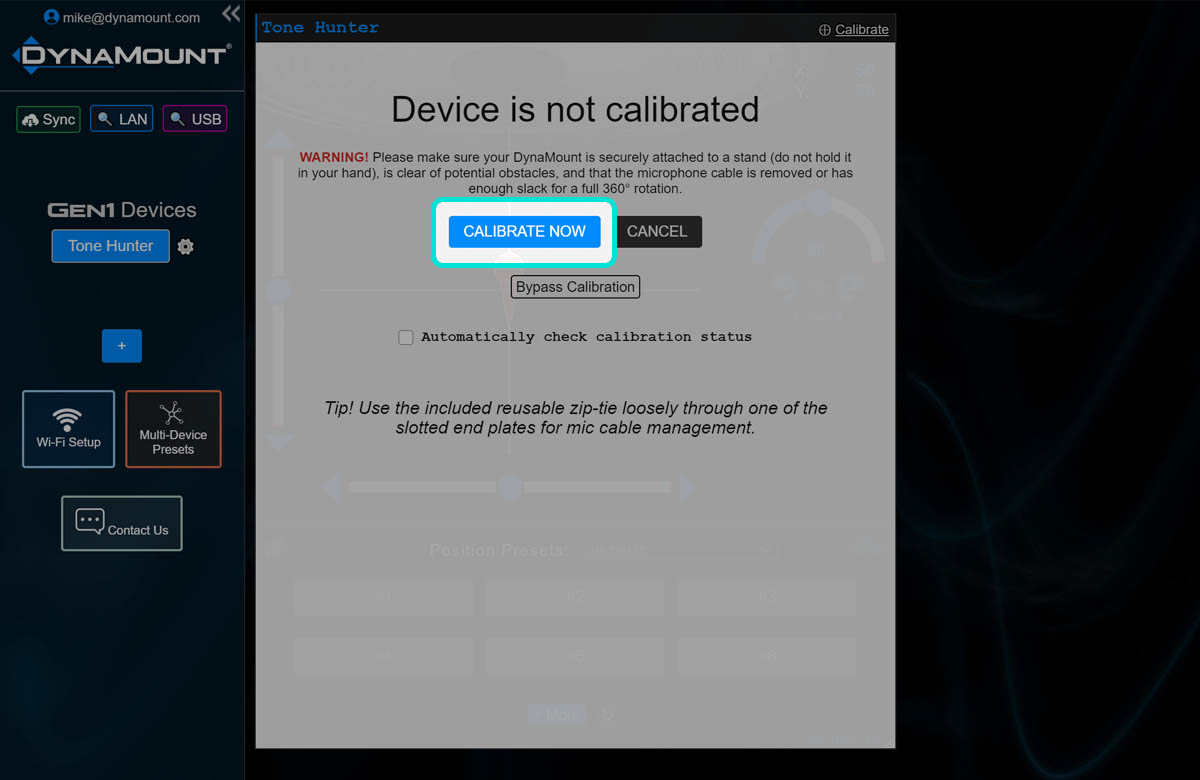
- Calibrate the DynaMount.
- If the DynaMount is being freshly set up for a new session, it is recommended to calibrate BEFORE attaching the microphone or mic cable.
- Firmly attach the desired microphone to your DynaMount, the included “jam nut” will help secure it at the desired starting angle. Certain mics (such as those with the XLR input on the bottom) will be more easily mounted with help from our Accessory Pack.
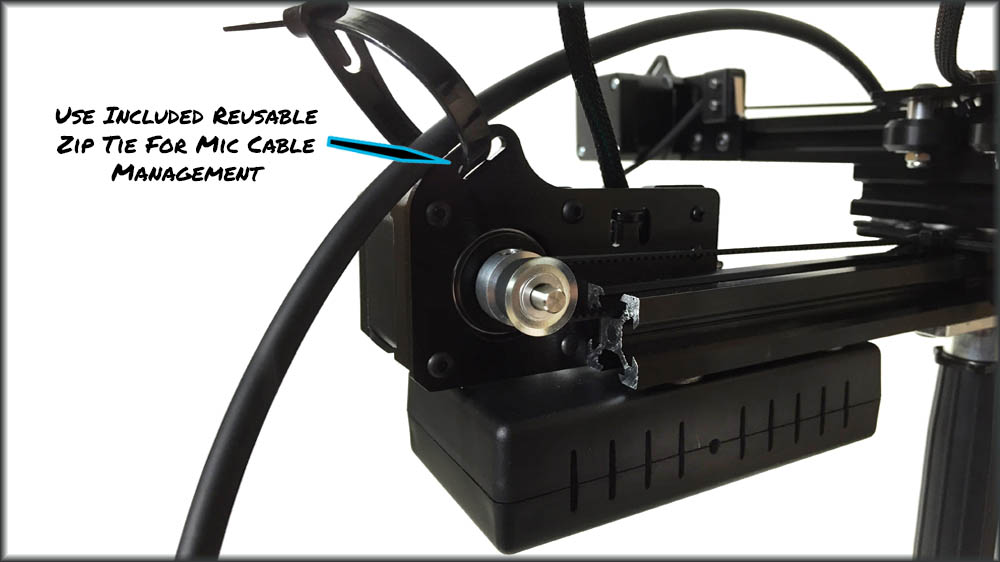
- Use the mic cable guides to keep the microphone cable out of the way.
- It is recommended to use the included reusable zip-tie to loosely secure the mic cable to the cable guide slot located above each motor.
- Please review the Product Specifications for information about maximum permitted microphone weights, etc.
- If you feel a sliding platform or rotation motor shift at all while attaching the microphone (due to the force from your hand), an additional calibration should be done to ensure precise and recallable mic placements.
- WARNING! Always check to make sure your microphone cable is being guided in such a way that it won’t jam on anything, and make sure you leave enough slack on the microphone cable to allow for the full range of motion in addition to a full 360° of rotation.
- You’re all set!