For Models: X1-R, X1, V1-R, V1
Wi-Fi Setup
Steps to get your DynaMount connected to your home/studio Wi-Fi network.
In order to wirelessly control a DynaMount it must first be connected to your Wi-Fi network. After completing these steps your DynaMount will be connected and Wi-Fi credentials saved so the next time it powers up it will connect automatically.
- This guide applies and the steps are the same regardless of whether you plan to use the iOS, OSX, Android, or Windows app.
For the Wi-Fi Setup process it is recommended to place your DynaMount close to your Wi-Fi router.
- Follow the steps in the Hardware Setup guide to get your DynaMount securely attached to a stand and powered up.
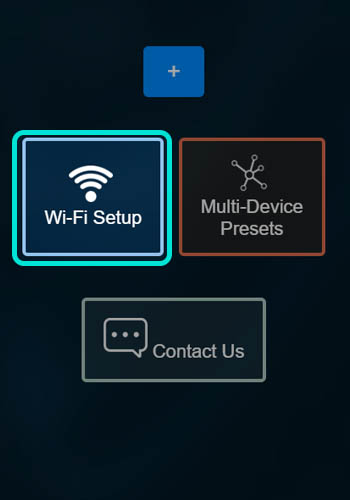
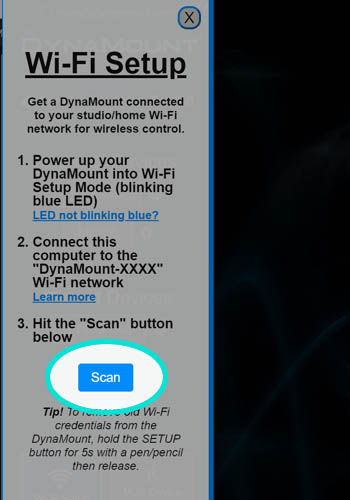
- In the “DynaMount” app, click on the Wi-Fi Setup button.
- If your DynaMount is already in Wi-Fi Setup mode (blinking blue LED), proceed to Step 4.
Not in Wi-Fi Setup mode? Press and hold the SETUP button (see photo below, DO NOT confuse with the RESET button) on your DynaMount for 5 seconds (no longer) with a pen/pencil then release. This will wipe out all saved Wi-Fi credentials on the device and reset it into Wi-Fi Setup mode.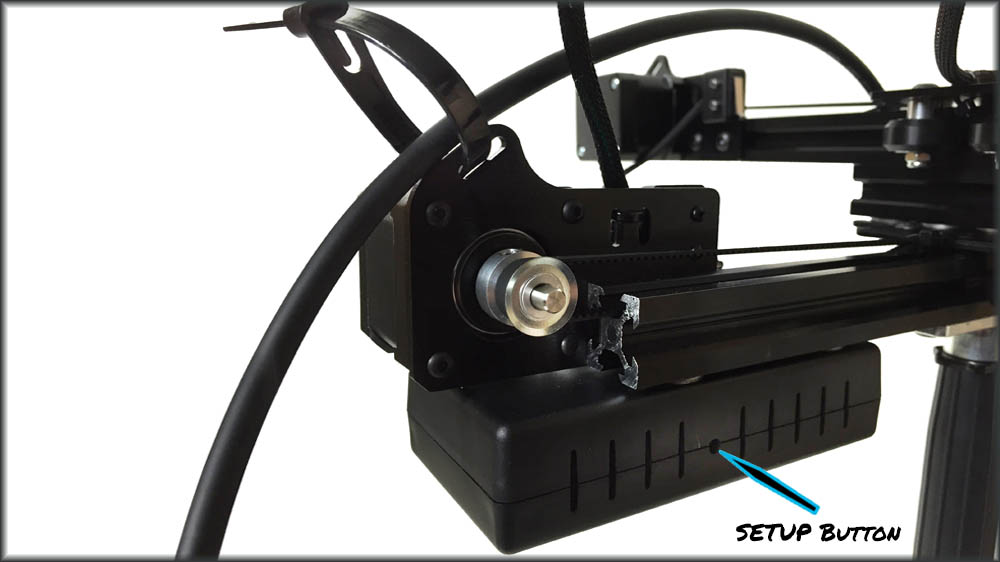
- When your DynaMount is in Wi-Fi Setup mode (blinking blue) it creates a “DynaMount-XXXX” Wi-Fi network.
• The “DynaMount-XXXX” network is only used for the Wi-Fi setup process and not for controlling your DynaMount. - Connect to this “DynaMount-XXXX” network from your computer or mobile device (no password is required).
• Tip! If your computer is connected to another network via Ethernet cable, this may need to be temporarily disabled/unplugged before connecting to the “DynaMount-XXXX” network for the Wi-Fi Setup process to complete successfully.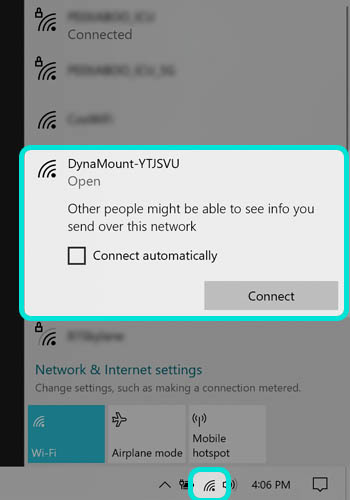
- Once connected to “DynaMount-XXXX”, click the “Scan” button in the app. This tells the DynaMount to search for available wireless networks.
- Available wireless networks will be listed. Don’t see your network?
- If this is your first time setting up this device, copy your DynaMount’s unique Device ID so you can paste it into the app later when adding a new device to your profile.
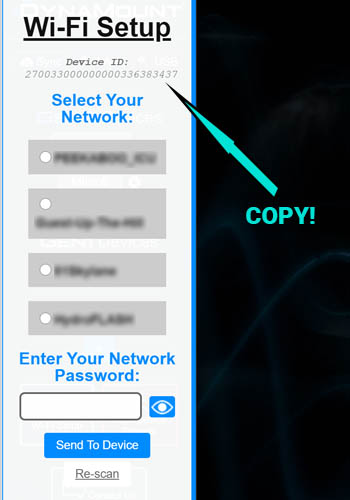
- Select your studio/home Wi-Fi network (2.4GHz only), enter the network password & hit “Send To Device”.
- You should immediately see the LED on your DynaMount begin blinking green which indicates that it is trying to connect to your Wi-Fi network. Once your DynaMount successfully connects, the LED will begin a slow “breathing” green.
- You will then see the LED briefly flash either light blue or orange depending on whether your network has an internet connection. For more info, please see our LED Color Codes guide.
- A message will display in the app, letting you know it has completed sending Wi-Fi credentials to the DynaMount.
- Lastly, connect your computer or mobile device back to your normal Wi-Fi network which your DynaMount is now connected to.
- You’re DynaMount is now connected!