For Models: X1-R, X1, V1-R, V1
Quick Start Guide (Gen 1)
Please follow along with the 7 steps below to get your Gen1 DynaMount up and running.
Step 1) Install The App
- Select the control app(s) of your choice and then install onto your computer or mobile device.
- We currently offer free apps for iOS, macOS, Android, and Windows.
Note: The app version available from the Microsoft Store link above supports Windows 10+, for Windows 7/8 please find a direct download link HERE.
Step 2) Create A Profile
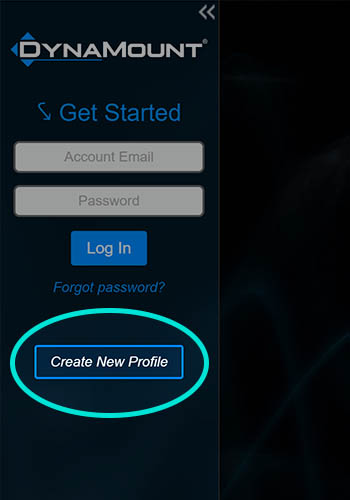
- After installing the control app(s) of your choice, launch it and select “Create New Profile”.
- After entering your email address and a new password, an activation email will immediately be sent to you.
- Click the confirmation link in this email to activate your new profile.
- “Role-based” email addresses such as those that start with info@, contact@, admin@, among others may see an error when trying to create a profile (for spam blocking reasons). If you need to use a role-based email, please contact us and we will be happy to add it manually.
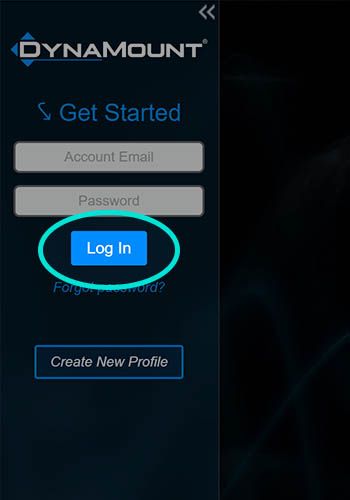
- Once your account is activated, log in using the email address and password you just created.
Step 3) Get To Know Your DynaMount
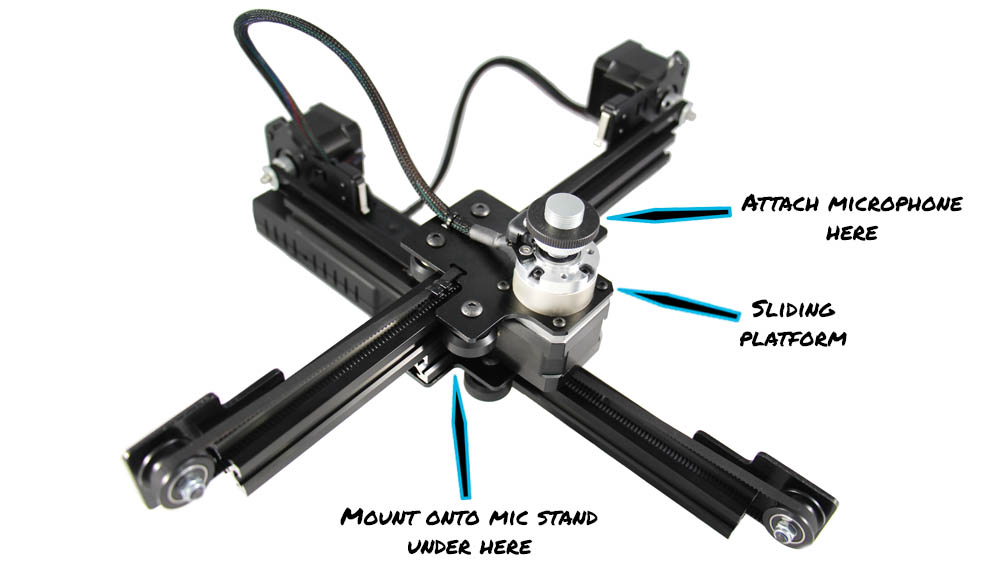
- It is important to know what/where everything is on your DynaMount.
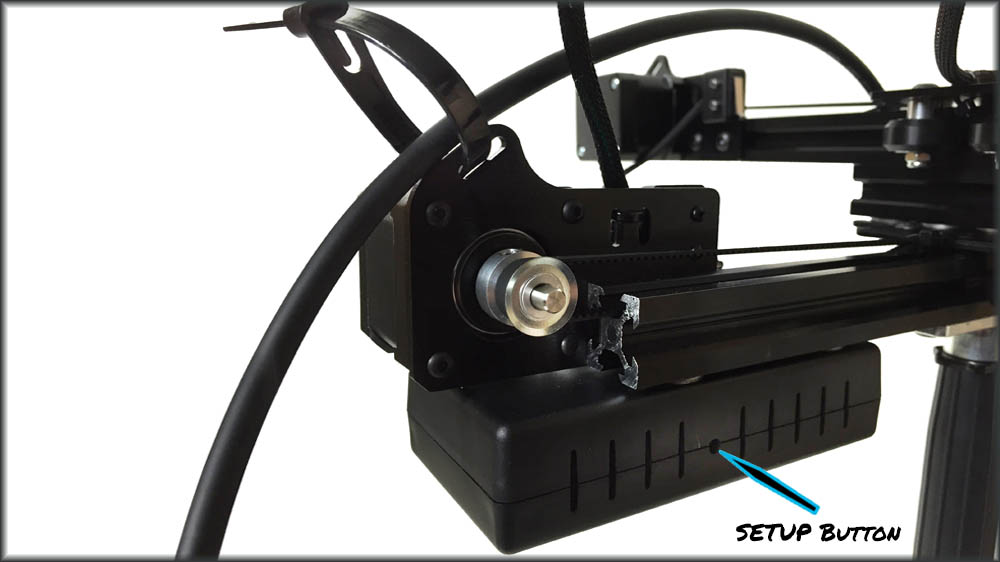
- Please look over the images below to learn about the buttons, power & USB connections, mic cable guides, etc.
- WARNING: When powered off, avoid moving the sliding platform(s) or rotating motors by hand. If absolutely necessary, move them very slowly.
- CAUTION: Motors may get hot during use.
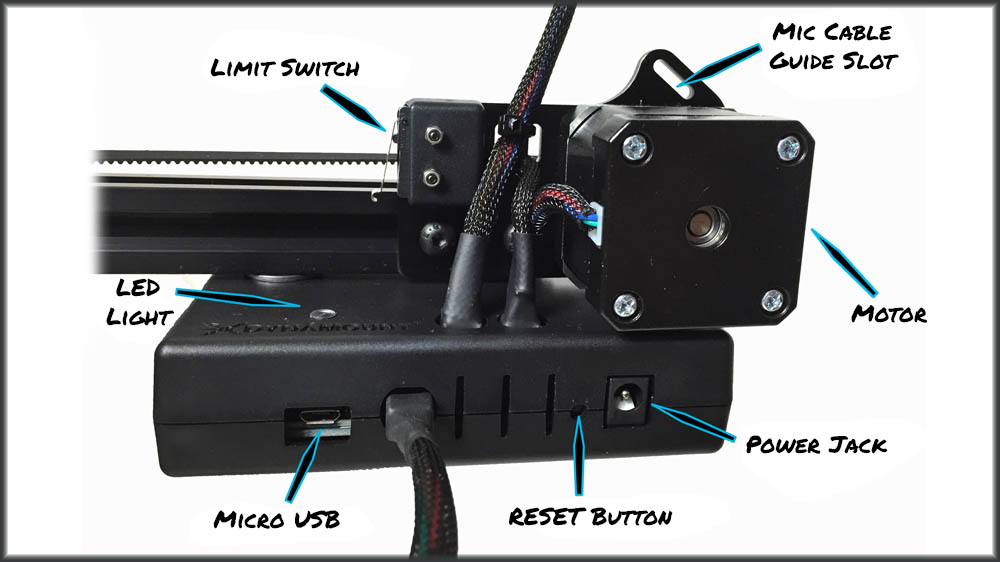
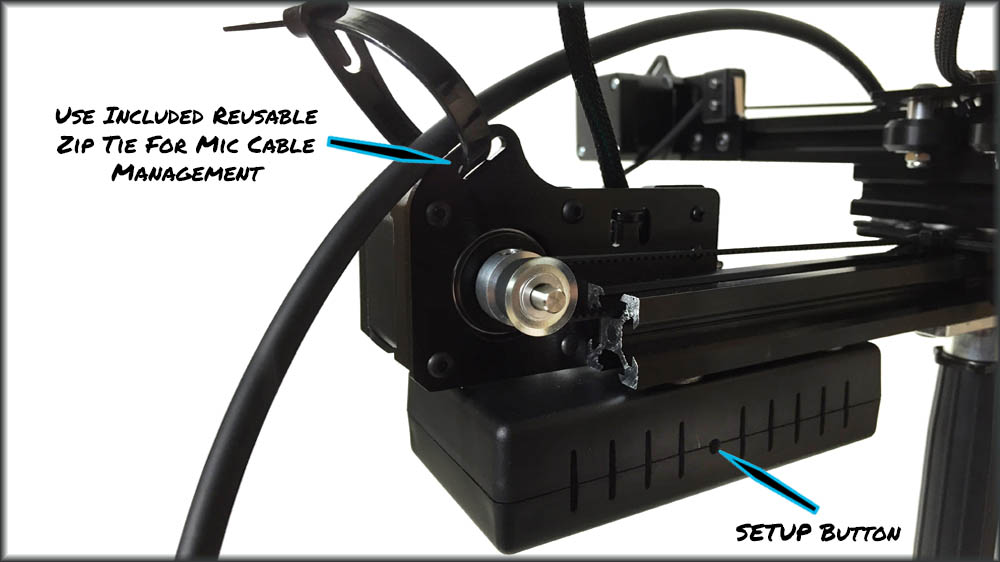
- Take note of how the RESET and SETUP buttons are on opposite sides of the enclosure, users sometimes mix them up.

- WARNING: If you have your DynaMount mounted vertically (or on an incline), DO NOT unplug the device without first supporting the weight of the microphone and sliding platform(s) with your hand. When the power is turned off, the motors no longer have any torque and the sliding platform(s) could fall quickly causing damage to your DynaMount or attached microphone. With sliding platform(s) and microphone supported, unplug the device and guide them very slowly down to a relaxed position.
- Once familiar with your DynaMount, please proceed to the next step.
Step 4) Power Up Your DynaMount
- Attach your DynaMount to a sturdy microphone stand. See our FAQ page for tips on which stands work well, mounting suggestions, etc.
- Warning! You must ensure the stand remains stable, even with full payload attached to the DynaMount and when positioned at the extremes of its range limits. Use a high-quality stand, and consider stabilizers such as studio sandbags over the base of the stand.
- After securely attaching your DynaMount to a sturdy microphone stand, plug in the included 12V DC adapter.
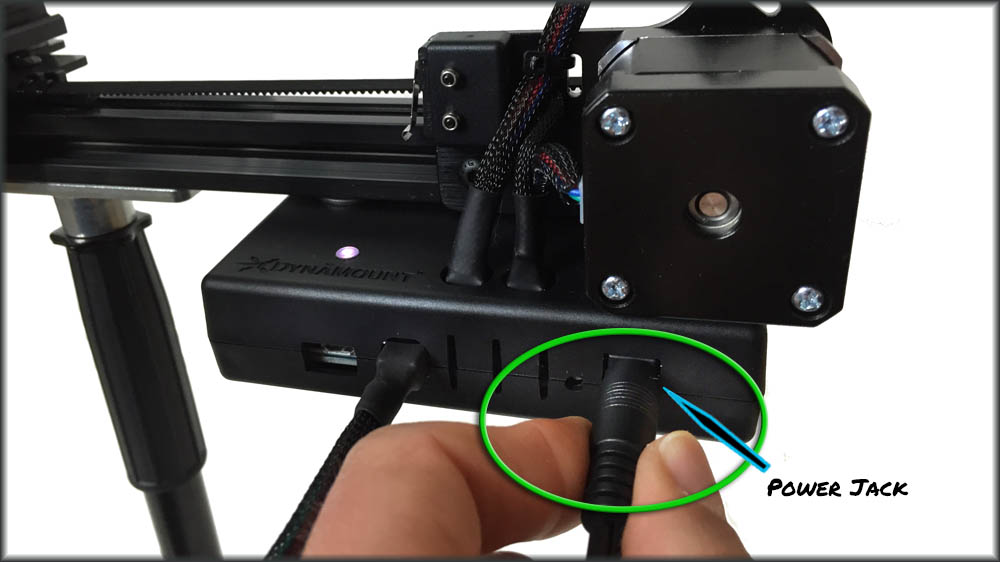
- The LED will immediately begin a slow “breathing” white as it boots up.
- After 15 seconds of booting up, new DynaMounts will then automatically begin blinking blue.
- Blinking blue means the DynaMount is in “Wi-Fi Setup” mode, and you are ready for the next step. LED not blinking blue?
Step 5) Set up Wi-Fi On Your DynaMount
- This step configures your DynaMount so it can connect to your studio/home Wi-Fi network, which is required for wireless control.
- If you don’t have a Wi-Fi network and plan to use USB only, please review the USB Control guide.
- It is recommended to position your DynaMount (with attached stand) close to your Wi-Fi router during this setup process. It is important to have a strong Wi-Fi signal for setup to be successful.
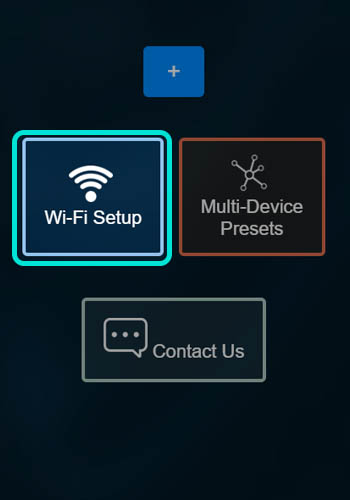
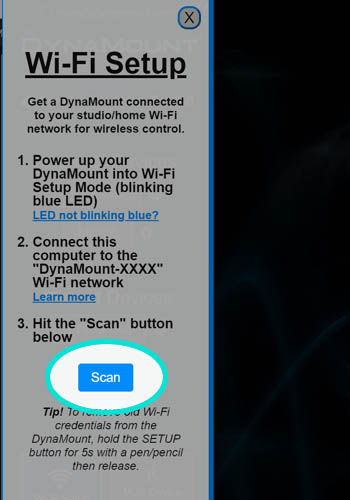
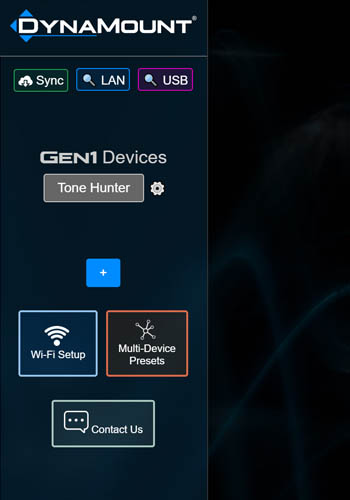
- In the app, click on the Wi-Fi Setup button.
- Now, confirm your DynaMount is in “Wi-Fi Setup” mode (blinking blue LED). Led not blinking blue?
- In “Wi-Fi Setup” mode (and only in this mode) your DynaMount will create & broadcast its own “DynaMount-XXXX” Wi-Fi network. Helpful tip…
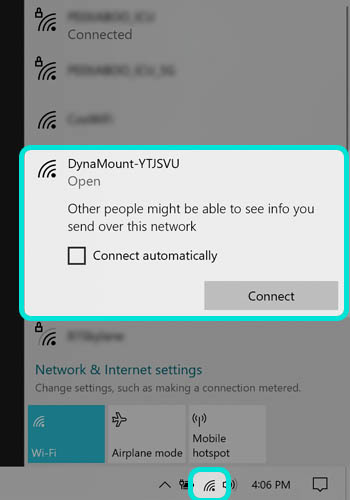
- From your computer or mobile device, connect to the “DynaMount-XXXX” Wi-Fi network created by your DynaMount (no password required).
• Tip! If your computer is connected to another network via Ethernet cable, this may need to be temporarily disabled/unplugged before connecting to the “DynaMount-XXXX” network for the Wi-Fi Setup process to complete successfully.
- Once connected to “DynaMount-XXXX”, click the “Scan” button in the app. This tells the DynaMount to search for available wireless networks.
- Available wireless networks will be listed. Don’t see your network?
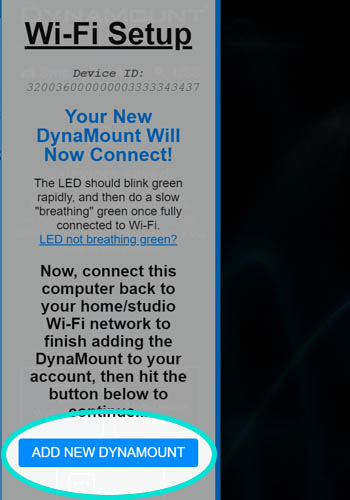
- Copy your DynaMount’s unique Device ID so you can paste it in the next step of this guide if needed when adding it to your profile.
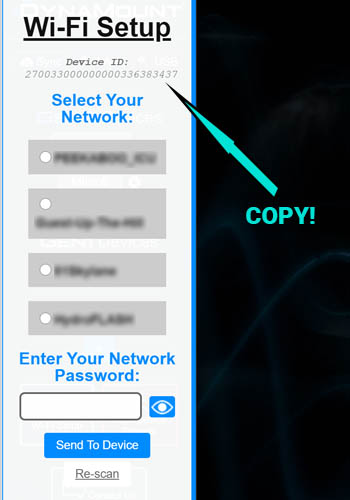
- Select your studio/home Wi-Fi network (2.4GHz only), enter the network password & hit “Send To Device”.
- You should immediately see the LED on your DynaMount begin blinking green which indicates that it is trying to connect to your Wi-Fi network.
- Once your DynaMount successfully connects, the LED will begin a slow “breathing” green. Having trouble?
- A message will display in the app, letting you know it has completed sending Wi-Fi credentials to the DynaMount.
- Connect your computer or mobile device back to your studio/home Wi-Fi network (which your DynaMount is now connected to), and then click “Add New DynaMount”.
Step 6) Add A DynaMount To Your Profile
- After clicking “Add New DynaMount” in the previous step, a message will appear that your DynaMount was discovered and is available for claiming. Learn More…

- The device Serial Number will likely be filled in for you automatically. If not, enter in the 8-digit Serial Number, then press “YES”. Where is the serial number?
- Give your DynaMount any name you like, then press “Claim It”.
- The new unit is now added to your profile and will appear under the “Gen1 Devices” list!
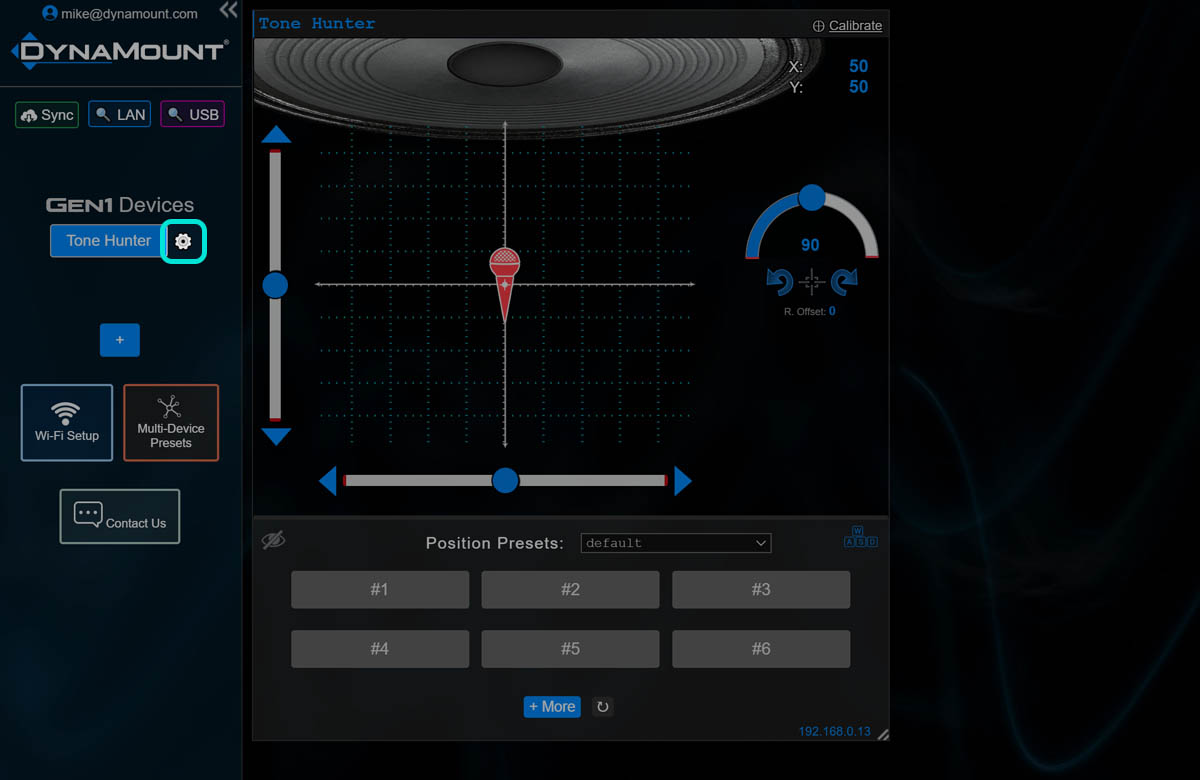
Step 7) Control Your DynaMount
- The device button for your new DynaMount will initially be gray, but will turn blue once the unit is discovered on your local network. Click the “🔍 LAN” (Local Area Network) button to find DynaMounts on your network. Button still gray?
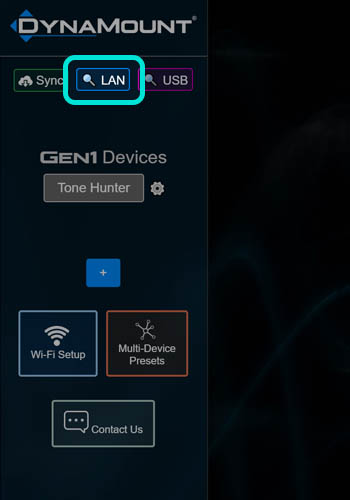
- To control the DynaMount, click on its button (now blue) in the “Gen1 Devices” list. Other button color meanings
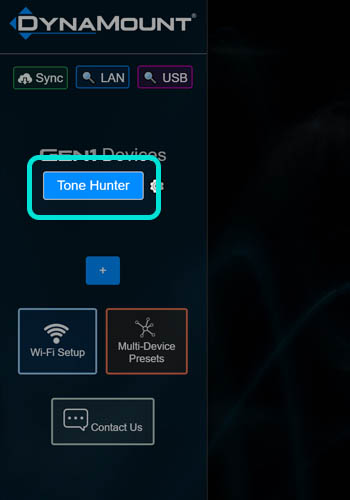
- The control screen will open and adjust automatically depending on which model DynaMount you are controlling.

- Each time your DynaMount is powered up it needs to calibrate. Can I bypass calibration?
- You can either click the “Calibrate” button in the top-right of the control screen, or you can simply try any motion command and it will automatically alert if calibration is needed.
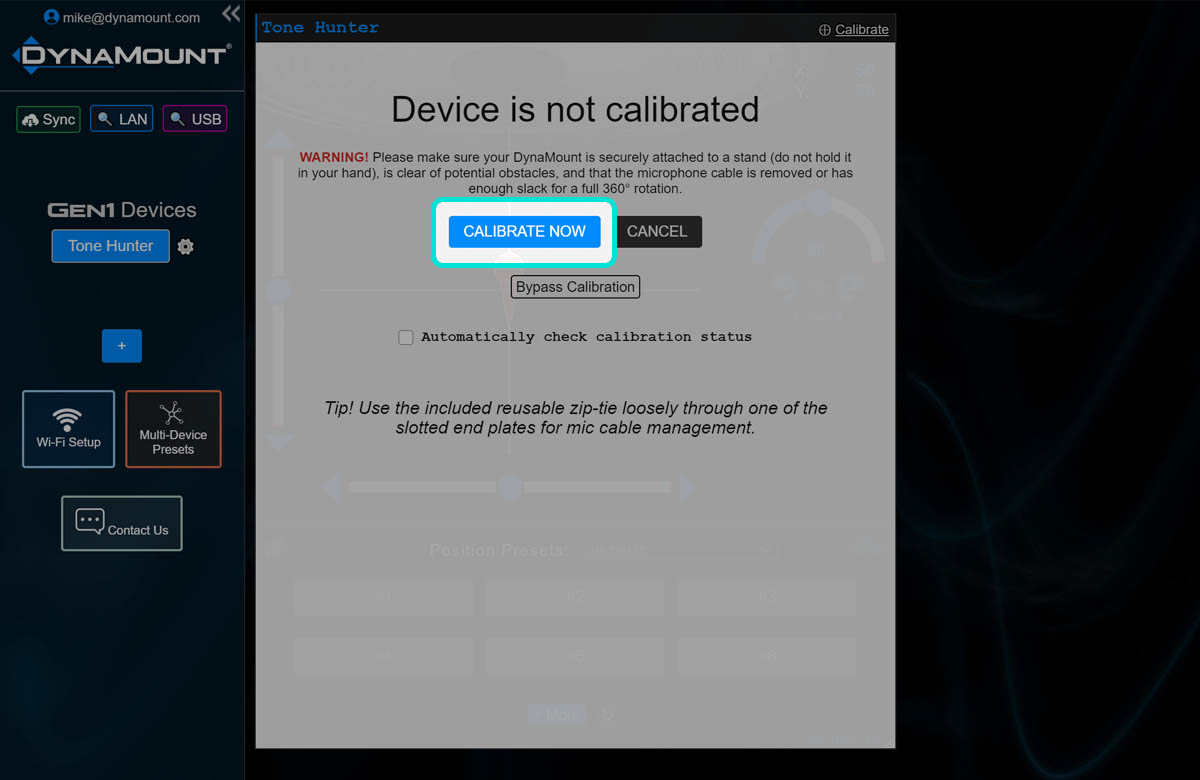
- Your DynaMount will run through a calibration sequence and then is ready for use!
- If your DynaMount is not responding this may be due to insufficient Wi-Fi signal strength. If this happens, move your Wi-Fi router closer to where you have your DynaMount set up then try again, or check out the other tips in our Troubleshooting FAQ. Please keep in mind that your DynaMount will perform at its best with a nice strong Wi-Fi signal.
- If you are using something like a Wi-Fi “range extender” it must be configured a certain way to work with your DynaMount. Please see our Troubleshooting FAQ for more info.
- Use the sliders, blue nudge arrows, or click anywhere on the grid to change the position of the DynaMount.
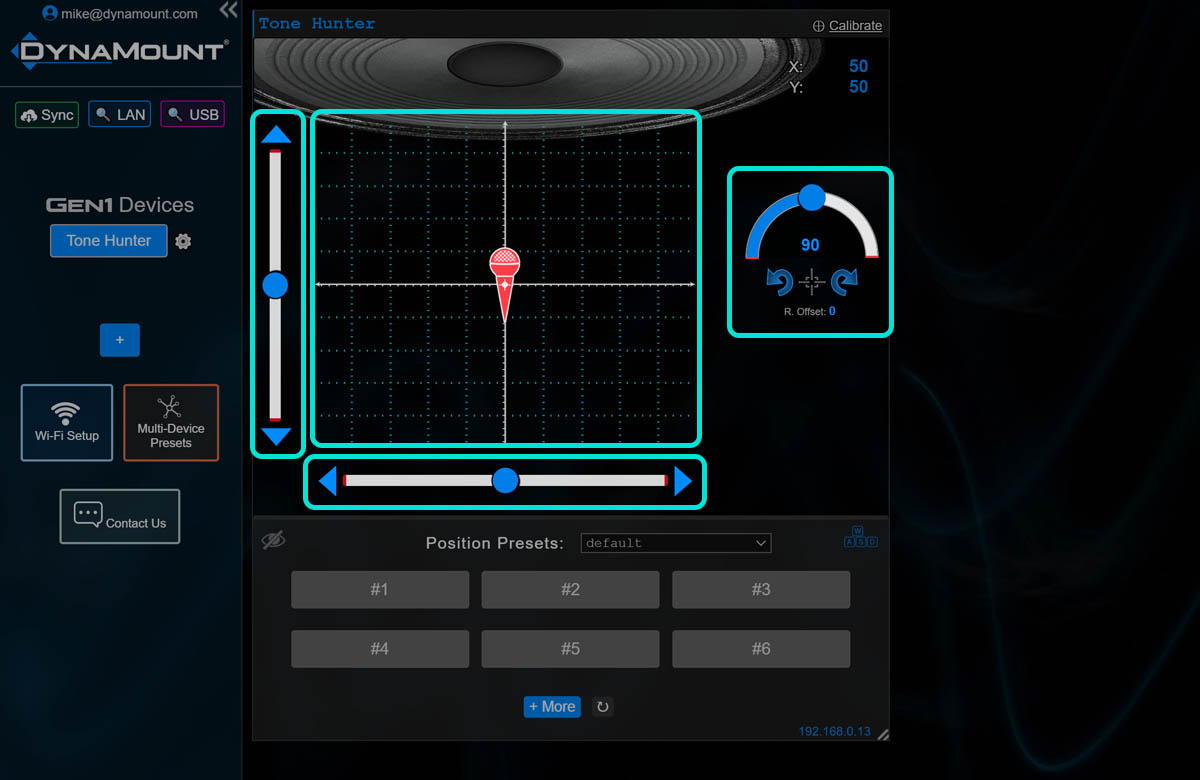
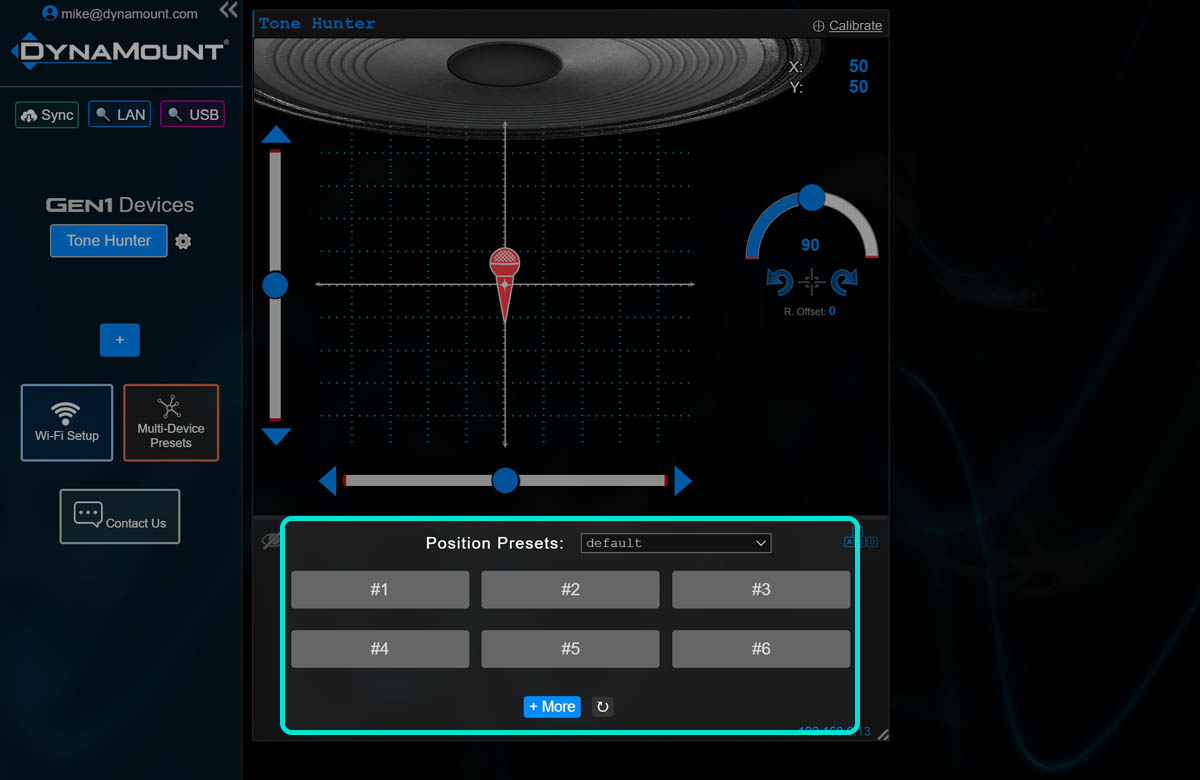
- Once you find a position you like, save it as a Preset! Click on any gray Preset button to save the current position, or click on any blue (already saved) Preset button to recall that position.
- Click on the Device Settings (gear) icon in order to change options like Motion Settings, Background Settings, etc.
- Please refer to the User Guides and Video Tutorials for info on all available control functions, using USB, troubleshooting, etc.
- Also, please review the Product Specifications for details on maximum allowed microphone weights & other important info.
- Have fun! 👍