For Model:
RIZR
Lectern Mounting Kit
Secure your RIZR directly to a lectern/podium.
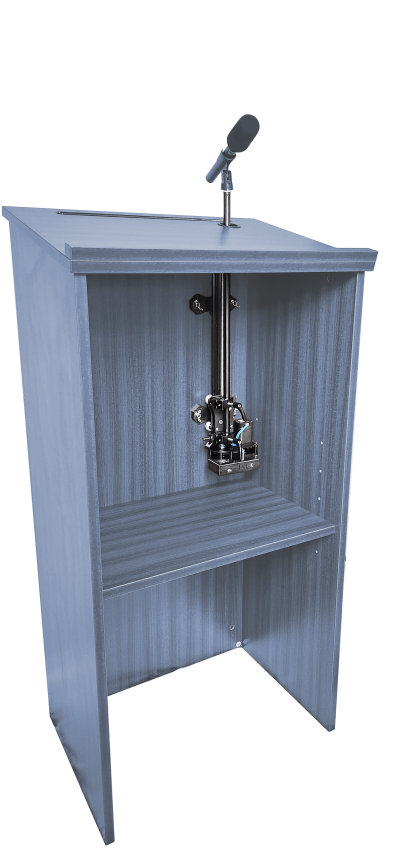
Please follow along with these instructions to mount your RIZR directly to a lectern/podium using the Lectern Mounting Kit.
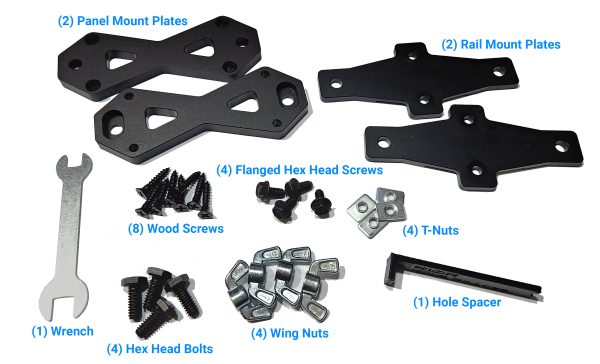
What’s Included
What’s Not Included
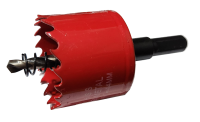
- Important! A hole saw (not included) is required to drill a single hole in the top of the lectern for the mic pole to pass through. A
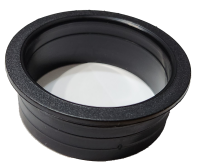
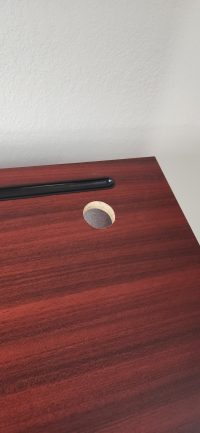
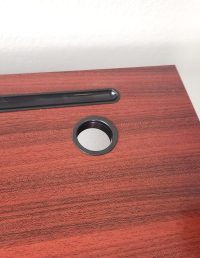
hole of 1.75” diameter (or larger) is recommended. - Tip! A hole grommet (not included) matched in diameter to the selected hole saw is recommended for aesthetics and for a smooth hole edge, though not required.
- Other tools you will need for installation:
- Drill
- Drill bit (3/16” or smaller)
- Phillips Screwdriver
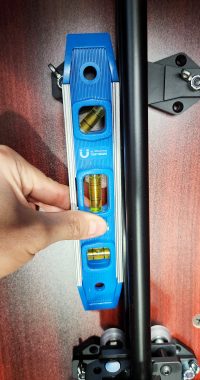
- Level
- Pencil/Pen
Preparing The Lectern
- The included Hole Spacer helps with marking the correct position where a hole needs to be drilled for the RIZR’s pole to pass cleanly through the top of the lectern
- Start by placing the short side of the Hole Spacer flat against the panel/surface of the lectern where the RIZR will be mounted
- Typically, this is the inside back or side wall of the lectern
- Slide the indicator upwards along the panel wall until the protruding end of the Hole Spacer contacts the underside of the lectern top
- Important! Keep the short end of the Hole Spacer flat against the panel wall, don’t angle or slope the indicator to match the slope of the lectern top
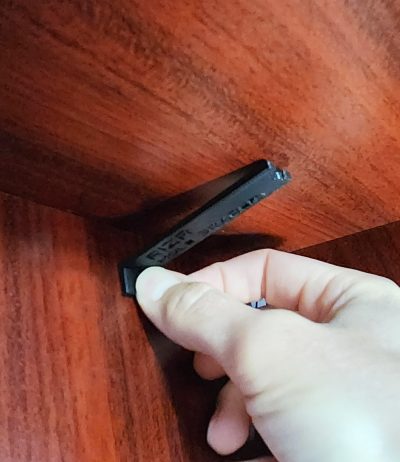
- Now, slide the indicator sideways until you have it positioned where you would like the hole in your lectern to be
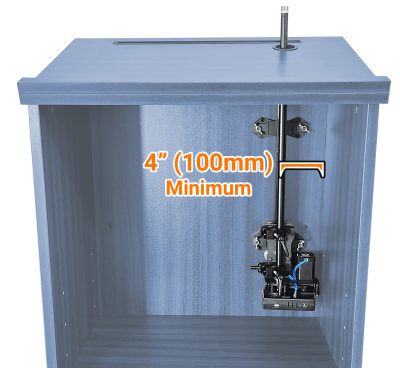
- Important! The hole must be at least 4” (100mm) from any internal side panel.
- Once you have the Hole Spacer in the desired position, use a pen/pencil to draw a small dot at the tip of the Hole Spacer
- At the marked dot, use a 3/16″ (or smaller) drill bit to drill a small hole ***STRAIGHT UP*** all the way through the lectern top
- Important! Drill vertically/plumb, not perpendicular to any slope in the top surface
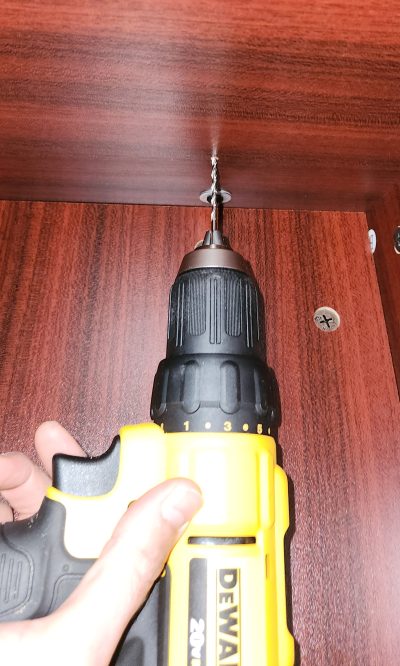
- Now, from the top/other side, drill a larger hole using your selected hole saw (at least 1.75” diameter) while using the small hole drilled in the previous step as the center point
- Important! Drill this hole ***PERPENDICULAR*** to the top surface, matching any
slope it may have 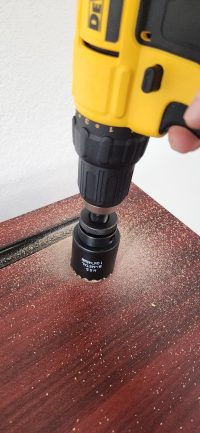
- Important! Drill this hole ***PERPENDICULAR*** to the top surface, matching any
- [Optional] Insert a grommet into the drilled hole for aesthetics and a smooth edge

Preparing The RIZR
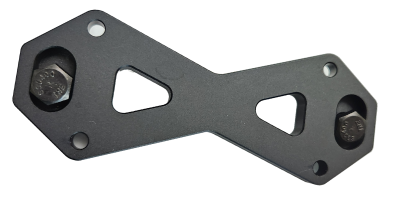
- Pass each of the smaller Flanged Hex Head Screws through a hole in the middle of a Rail Mount Plate, and partially thread a T-Nut on just enough to keep the screw from falling off
- Important! Ensure the T-Nuts are on the side of the plate with the carved channels
- Line up the T-Nuts with the cutout at the end of the rail on the RIZR, and slide the T-Nuts into the groove of the rail
- With the T-Nuts now within the groove of the rail, slide the two Rail Mount Plates into the desired positions along the rail and secure them by tightening the Flanged Hex Head Screws with the included Wrench
- Note, the exact positions of these plates along the rail is not critical, but it is recommended to place the bottom plate roughly an inch or two above the motor and place the top plate as far apart as possible while still convenient for mounting.

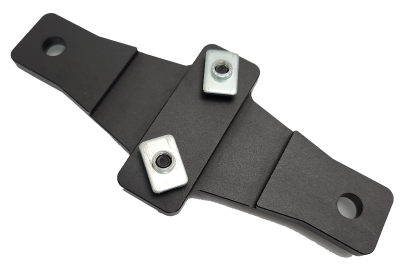
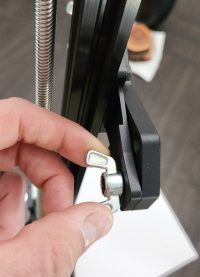
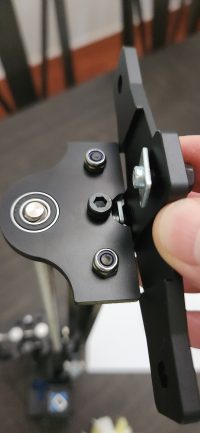
- Now, pass each of the larger Hex Head Screws through a Panel Mount Plate, such that the head of the screw ends up captive in the cutout of the plate
- Secure the two Panel Mount Plates directly to the Rail Mount Plates (already on the RIZR) by tightening the Wing Nuts onto the Hex Head Screws
- The plate cutouts will keep the Hex Head Screws captive and prevent them from spinning while tightening the Wing Nuts (no tools required to tighten)

Securing the RIZR to the Lectern
- Important! Before continuing, it is recommended to:
- Remove the 22” mic pole from the RIZR (if already attached)
- Power up the RIZR
- Run through a standard calibration
- Using the DynaMount app, ensure the unit is positioned at its LOWEST POINT
- Then power off the unit and continue
- This will help ensure the RIZR does not end up mounted too low on the lectern
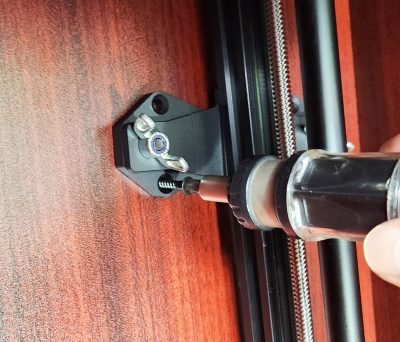
- Now that the RIZR is set to its lowest position, pass the mic pole through the drilled hole in the lectern top and secure it to the RIZR by tightening the levers on the crab clamps
- Remove the small snap-on mic cable clip from the pole for now
- Position the RIZR at the desired height in the lectern
- Important! Ensure the RIZR is mounted high enough so that the mic or mic clip doesn’t jam against the top of the lectern during motions (at its lowest position)
- Tip! To temporarily hold the RIZR in position within the lectern while completing the remaining mounting steps, it can be easy to stack some books with the RIZR carefully resting on them at the desired height

- Verify the RIZR is centered under the drilled hole and that all looks good with the positioning of the RIZR and mounting plates (no interference or other issues)
- If needed, plate positions may be changed by loosening the Flanged Hex Head Screws and adjusting their positions, then re-tightening the screws
- Place one of the Wood Screws through a countersunk hole in a Panel Mount Plate and tighten it into the lectern
- Pilot holes (7/64” diameter) can be drilled prior to each Wood Screw if desired, but it’s not required
- Different screws may be required for various mounting situations, but the included Wood Screws are a good general-purpose option. Screws shorter than 7/8” long are not recommended.
- Use a level to verify the RIZR is positioned perfectly plumb/vertical
- Place another Wood Screw through the hole in the opposite corner of the Panel Mount Plate from the first screw, and tighten it into place
- Proceed with the remaining six Wood Screws
- That’s it! Test the RIZR without any payload first to ensure everything is securely mounted and at the desired height
- Tip! If Ethernet control is desired but the tight clearance is making it difficult to access the RJ45 jack on the mounted RIZR for plugging in the Ethernet cable, loosen or remove the four Wing Nuts to increase clearance, plug in the cable, then re-tighten the Wing Nuts. Alternatively, a “down-angle” Ethernet cable could be used.
Tip! If sometime later it is desired to remove the RIZR from the lectern, you can simply loosen the Wing Nuts – with no tools required – and remove it. Keep the Panel Mount Plates in place on the lectern and the Rail Mount Plates in place on the RIZR for easy reinstallation to the lectern later!