USB Setup (Gen 2)
Control your gen2 DynaMount via a direct USB connection.
Note! If you are looking for info on how to use third-party USB controllers/joysticks (such as NES classic style) with your DynaMount, that info is found in our USB Joysticks guide. Joysticks like those are plugged into your laptop/desktop computer and used with our app, they are not plugged directly into your DynaMount.
While it is generally recommended to control your DynaMount over a network when possible using either Wi-Fi or Ethernet, there are situations where a direct USB connection is preferred. With a wired USB connection, range is limited to about 15 ft (unless you get “active repeater” style USB 2.0 cables), but on the plus side latency is extremely low.
After completing these steps, your gen2 DynaMount will be connected for control via USB.
- Power up the unit with the included 12V power supply
- Warning! If you plug in the USB cable first, the LED on the unit will turn on but it will not receive enough power to run properly. It is important to plug in the 12V power supply first.
- Once the unit has finished booting up (blinking blue LED), connect a USB cable from the unit to your computer.
- Windows users: If this is your first time connecting it to this computer and drivers do not install automatically, please see the Manual Windows Driver Installation instructions below.
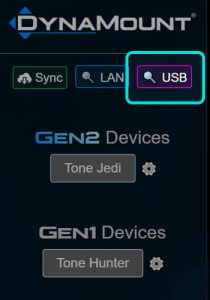
- Click the small magenta “🔍USB” button to now discover the unit.
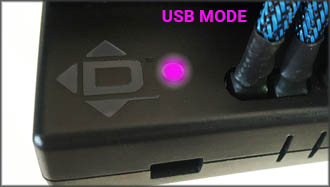
- The LED on the DynaMount will turn MAGENTA indicating that it is now in USB mode.
- Click on the device button (which should now also be magenta) in the app to open a control window and begin positioning the unit over USB.