Gen2 Quick Start Guide
Please follow this guide to get your new gen2 DynaMount up and running!
Having trouble or can’t find the information you’re looking for? Please contact us.
- macOS:

- For Mac laptop/desktop computers.
- Requires macOS version 10.10+
- iOS:

- For mobile iPhone/iPad devices.
- Requires iOS version 11.0+
- Android:

- For Android mobile phones/tablets.
- Requires Android version 5.1+
- Windows:

- For Windows laptop/desktop computers.
- Requires Windows version 7+ (see note below)
- Note: The app version available on the Microsoft Store requires Windows version 10+, though for Windows 7/8 users we have a direct app download available here.
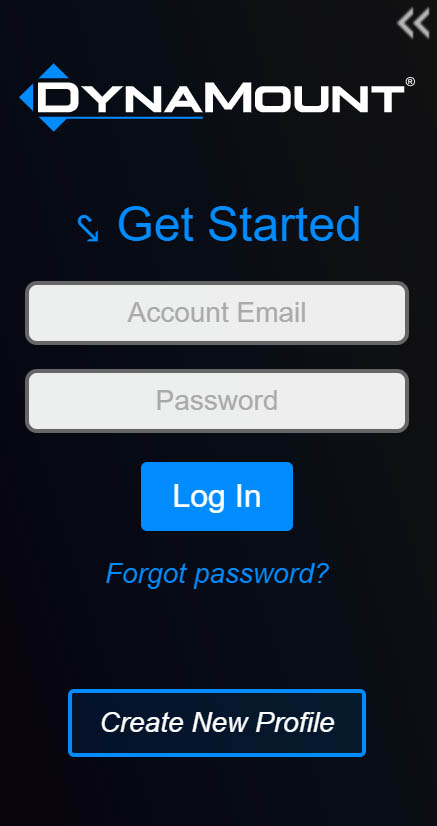
- Open the DynaMount app, then either log in with your existing DynaMount profile or click “Create New Profile” and follow the instructions.
- “Role-based” email addresses such as those that start with info@, contact@, admin@, among others may see an error when trying to create a new profile (for spam blocking reasons). If you need to use a role-based email, please contact us and we will be happy to add it manually.
- Warning! Make sure even at the range of motion limits that the stand will remain stable, with the full weight of the mic/payload attached. Not verifying this could result in the stand tipping over during motions, resulting in damage to the DynaMount and/or microphone.
- Warning! If using Power over Ethernet (PoE) for power (applies only to X2-R Micro, and some Custom Shop units), it is required to mount the unit level/horizontal with the ground. Motor power is scaled down to run cooler on PoE, so it cannot “lock” the motors in position securely enough for mounting the unit on an incline/vertically.
- Note! A wide tripod style stand is generally recommended over a round/weighted base stand, for maximum stability.
- Note! Studio sandbags can also be helpful to ensure stand stability.
- For a list of tested mini-stands and some other helpful mounting tips (such as how to mic the bottom speaker on a cabinet), please see our FAQ page.
If you would like to control the DynaMount wirelessly, click on the “Wi-Fi Setup” button, then follow the instructions to get the DynaMount connected to your home/studio Wi-Fi network.

- Note! If the LED on the DynaMount is SOLID ORANGE after booting up, this just means it was connected via Ethernet on the previous boot. Simply wait for ~30s, and it will automatically switch back to Wi-Fi mode.
- Note! If the LED on the DynaMount is BLINKING GREEN RAPIDLY, it is trying to connect to a Wi-Fi network. If it stays this way for an extended period, it is unable to connect to the network, and perhaps the Wi-Fi credentials stored on the DynaMount need to be reset.
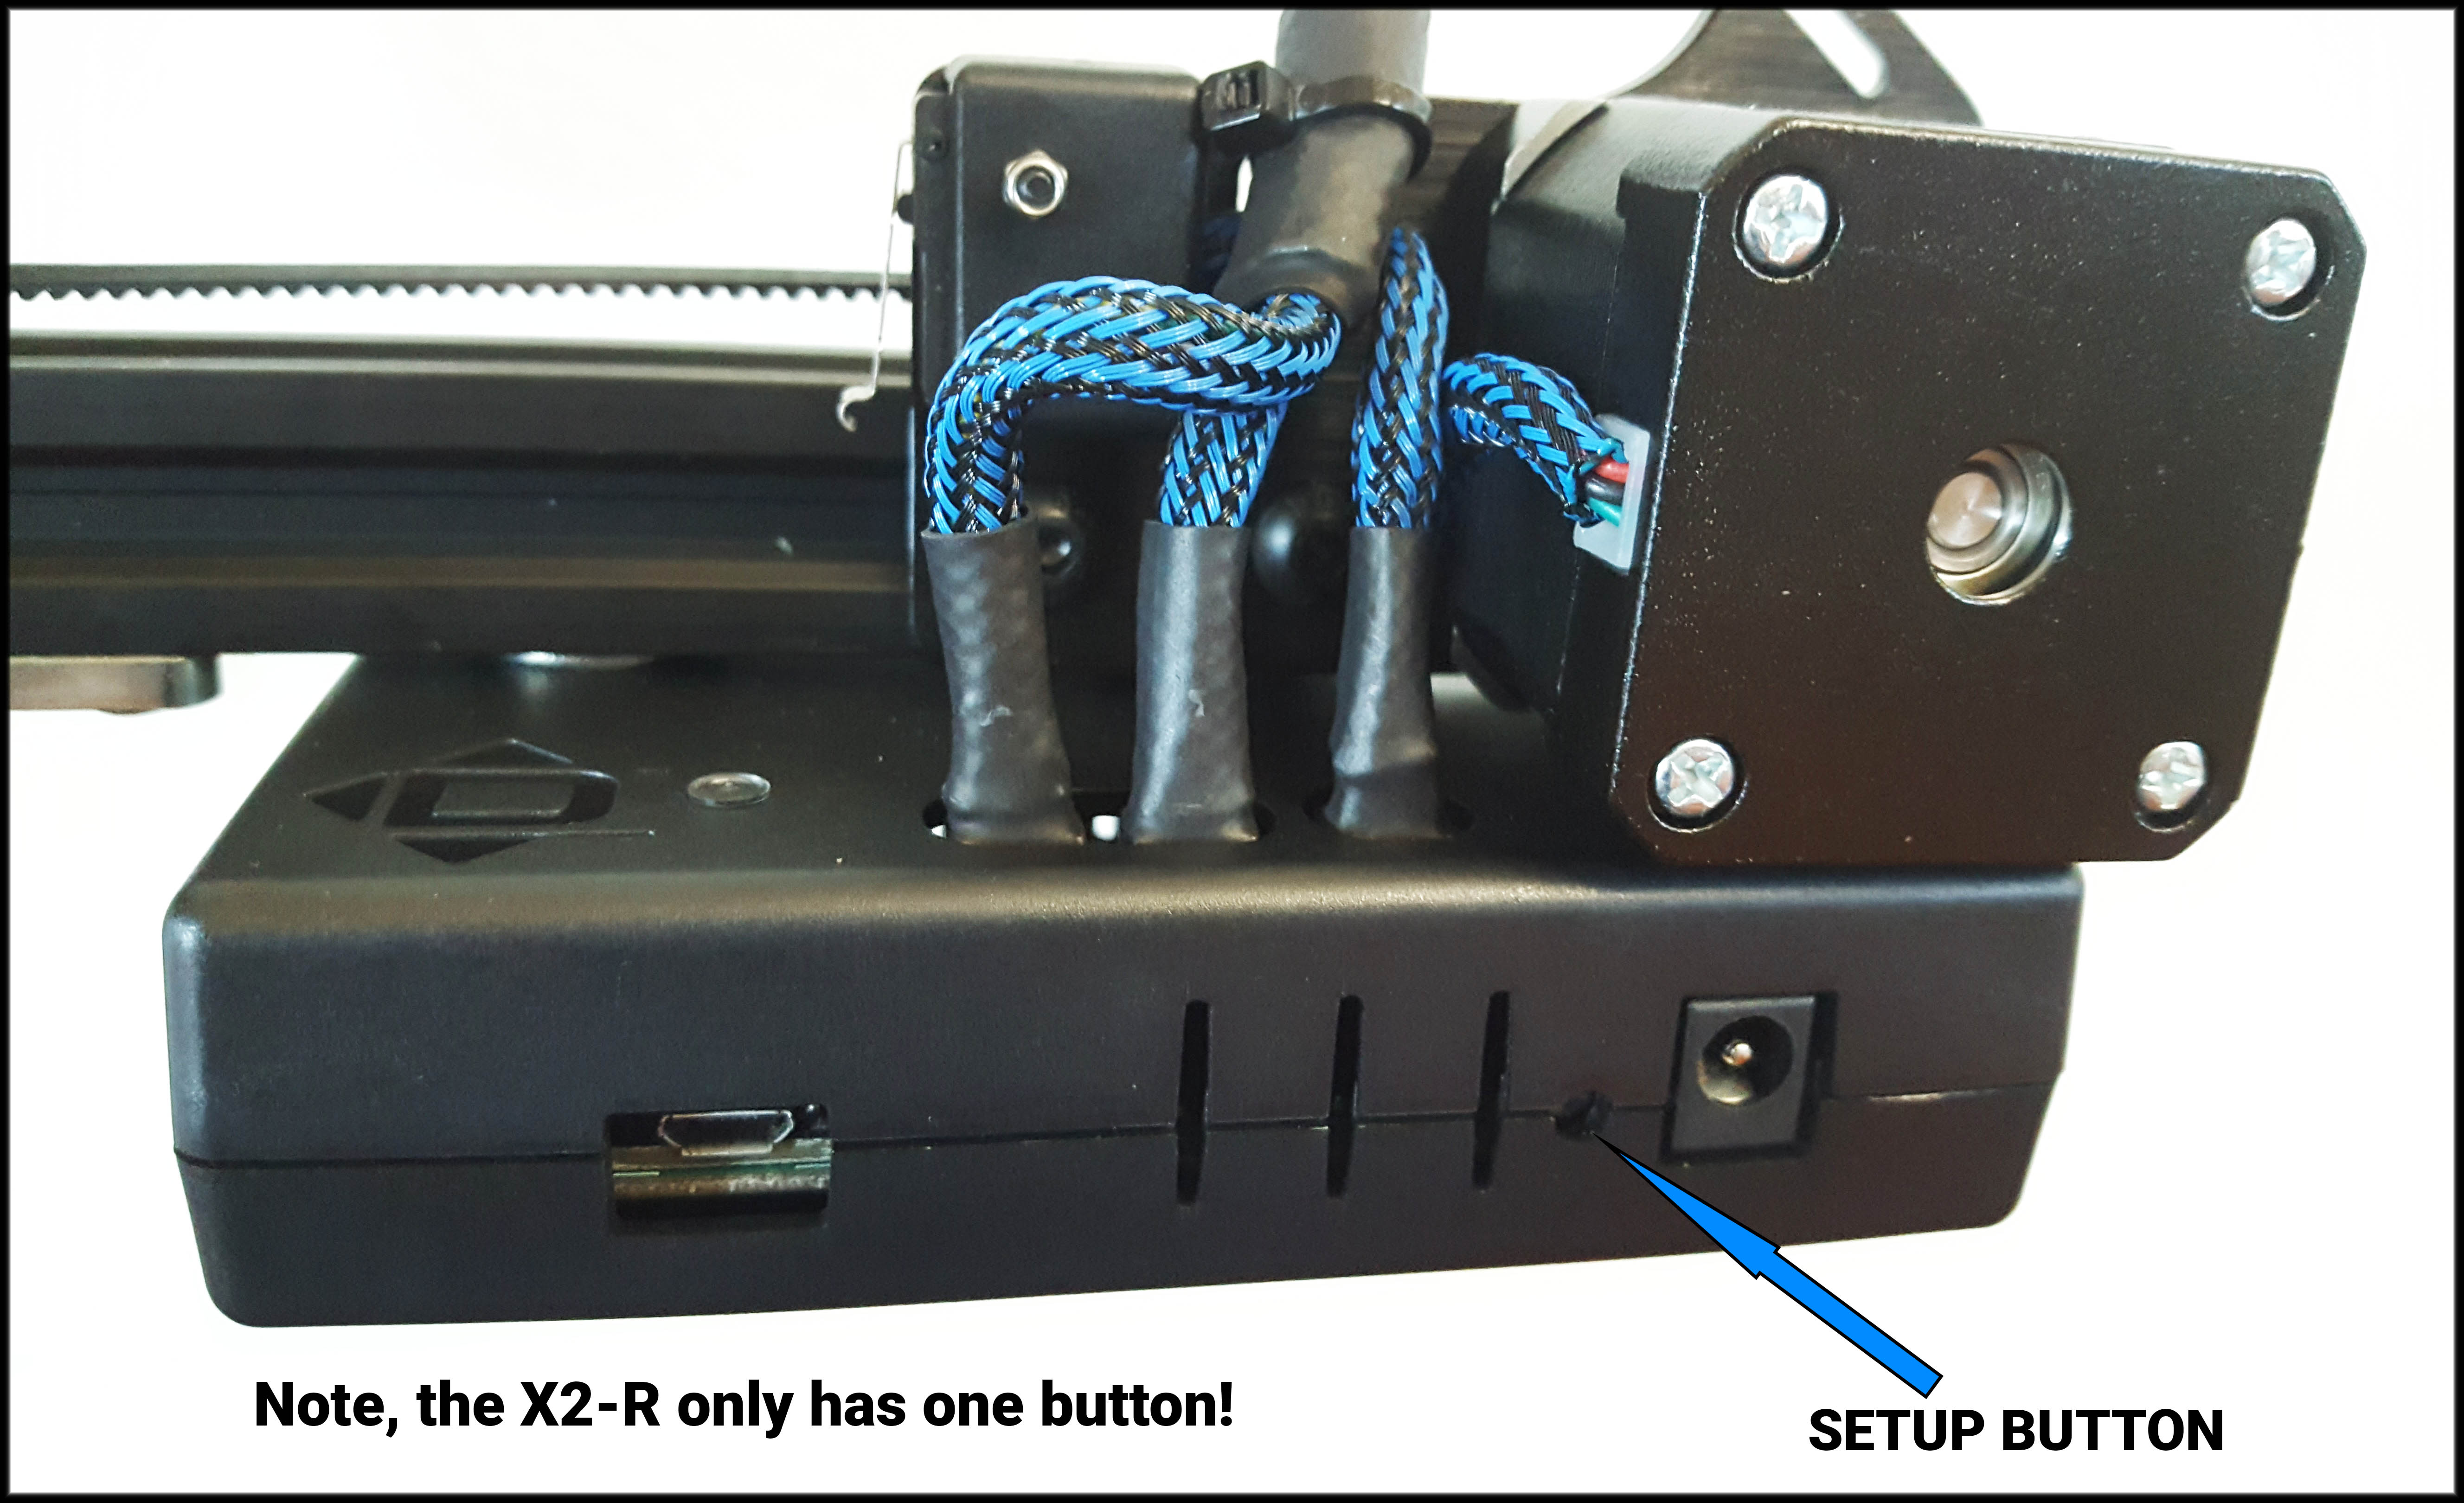
- Note! To clear out old Wi-Fi credentials from the device, press and hold the SETUP button with a pen/pencil for 5s then release.

After the DynaMount has been successfully connected to your home/studio Wi-Fi network, the LED will do a SLOW BREATHING GREEN. Make sure your computer/phone is connected to this same network as well.
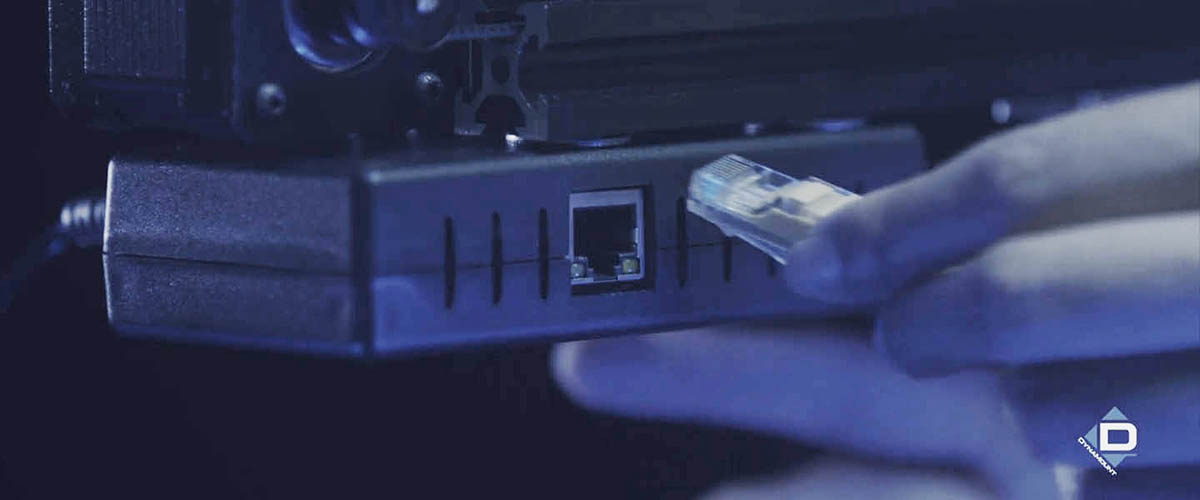
- With the unit powered off, plug in any cat5 or cat6 Ethernet cable between the DynaMount and your network router or Ethernet switch.
- Warning! Only plug/unplug an Ethernet cable from the DynaMount while the power is OFF.
- Note! For a typical setup, the Ethernet cable needs to connect from the DynaMount to your network router/switch (for control over the network). Do NOT plug the Ethernet cable directly from the DynaMount to your computer.
- If using Power over Ethernet (PoE) for power (applies only to X2-R Micro, and some Custom Shop units), it will boot up as soon as the cat6 cable is plugged into a PoE-capable router/switch/injector. The unit will automatically default to Ethernet control (as opposed to Wi-Fi), and you can proceed to the next section of this guide.
- Otherwise, if NOT using PoE, proceed with the steps below:
- Plug in the included 12V power supply, to begin booting up the unit.
- IMPORTANT! While the unit is still booting up (breathing white LED for first ~8 seconds) press and hold the SETUP button with a pen/pencil, then release it when the LED turns ORANGE.
- This tells the unit to connect over Ethernet (as opposed to Wi-Fi)
- The LED will stay SOLID ORANGE for a few seconds while attempting to connect via Ethernet, and then will turn SOLID LIGHT BLUE once fully connected.
- Note! The next time it boots up, the DynaMount will remember that Ethernet was used on the previous boot and will automatically default to Ethernet control, no need to press the SETUP button each time.
If you would like to control the DynaMount via USB cable, please follow the steps below:
- Power up the DynaMount with the included 12V power supply
- Warning! If you plug in the USB cable first, the LED on the unit will turn on but it will not receive enough power to run properly. It is important to plug in the 12V power cable first.
- Once the unit has booted up (blinking blue LED), plug a USB cable from the unit to your computer
- Note! Standard USB cables are typically available only up to ~15ft long. For longer cable runs, we recommend using USB 2.0 “active repeater” style cables.
- Windows users: If drivers do not successfully install automatically, please see the Manual Windows Driver Installation instructions further below.
- Click the small magenta “USB” button above the “Your Devices” list to scan for the USB device
- The LED on the DynaMount will glow MAGENTA while being controlled via USB
Manual Windows Driver Installation
These steps are only needed for Windows users whose computer was unable to automatically install necessary drivers. Usually, Windows 10 is able to install drivers automatically, but Windows 7 users may need to follow this procedure:
- Download the Windows drivers HERE.
- Unzip the file. It is fine to unzip this into your Downloads folder.
- With a USB cable plugged between the DynaMount and your Windows computer, open up your computer’s Device Manager.
- Under “Other Devices” (or possibly “Ports” on Windows 10), right-click on “Photon with WiFi”.
- Select “Update Driver Software”.
- Select “Browse my computer for driver software”.
- Navigate to the unzipped drivers folder you downloaded and unzipped earlier.
- The driver is called “photon.cat”.
- It will prompt to install device software: Particle Ports by Spark Labs, Inc.
- Select “Install”.
- It should say “Windows has successfully updated your driver software” for this device: Photon
- Hit “Close”.
- In the Device Manager you should now see “Photon” under Ports
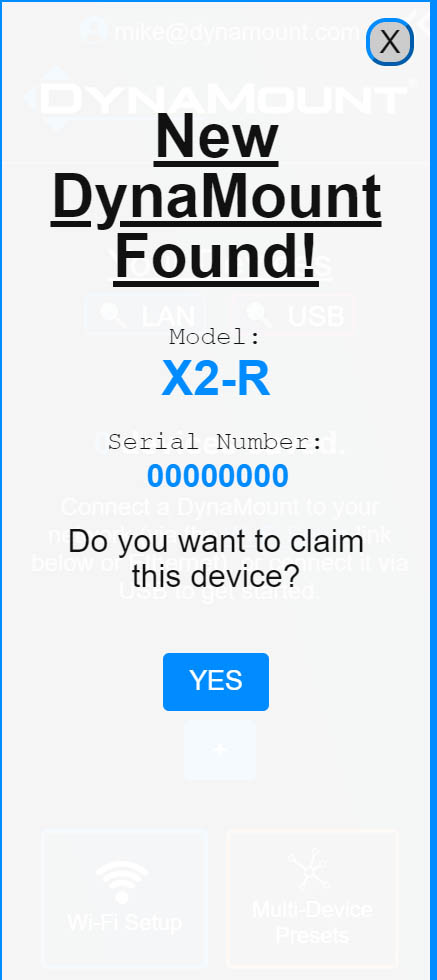
- Once the DynaMount is connected to your network (Wi-Fi/Ethernet) or connected via USB, A “New DynaMount Discovered” message will pop up in the app asking if you would like to claim the device. Click “Yes”.
- If using Wi-Fi/Ethernet and the message does not show up:
- Double-check your computer is connected to the same network as the DynaMount, then try clicking the “LAN” button to scan for units on the network
- If it still does not show up, check the LED on the DynaMount to make sure it is doing a slow breathing green (connected to Wi-Fi) or a solid light blue (connected to Ethernet). Otherwise, the unit may not be connected to your network. LED Color Codes
- If using USB and the message does not pop up, try clicking the “USB” button a couple more times, or try a different USB cable. If it still does not show up, and you are using a Windows computer, double-check that you installed necessary drivers as described in the USB Setup section.
- If using Wi-Fi/Ethernet and the message does not show up:
- Give the DynaMount any name you would like, then click OK.
- You will see a new button with the assigned name appear in the “Your Devices” list
- This button will highlight blue (Wi-Fi/Ethernet) or magenta (USB) indicating the DynaMount is ready to control!
- Click the new unit’s button in the “Gen2 Devices” list to open its control window
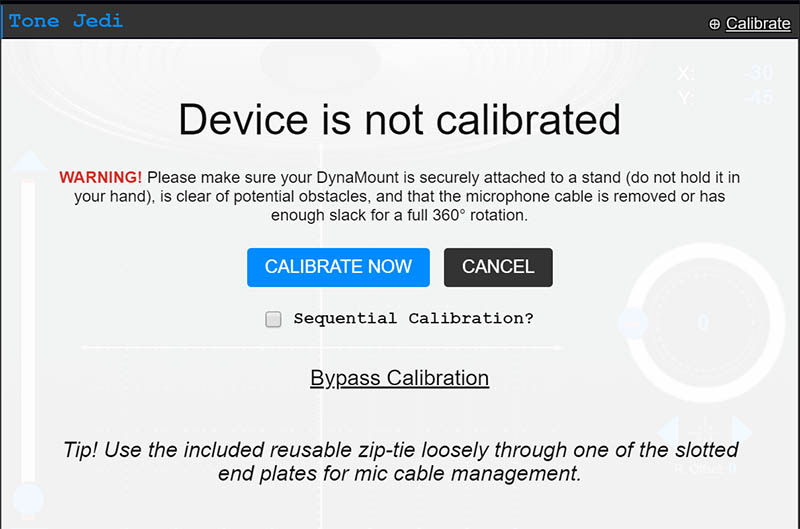
- Once opened, a message will appear that the device needs to calibrate. Read the caution message, then click “Calibrate” when ready. The DynaMount will now move and calibrate itself!
- Once calibration finishes, the control window will appear.
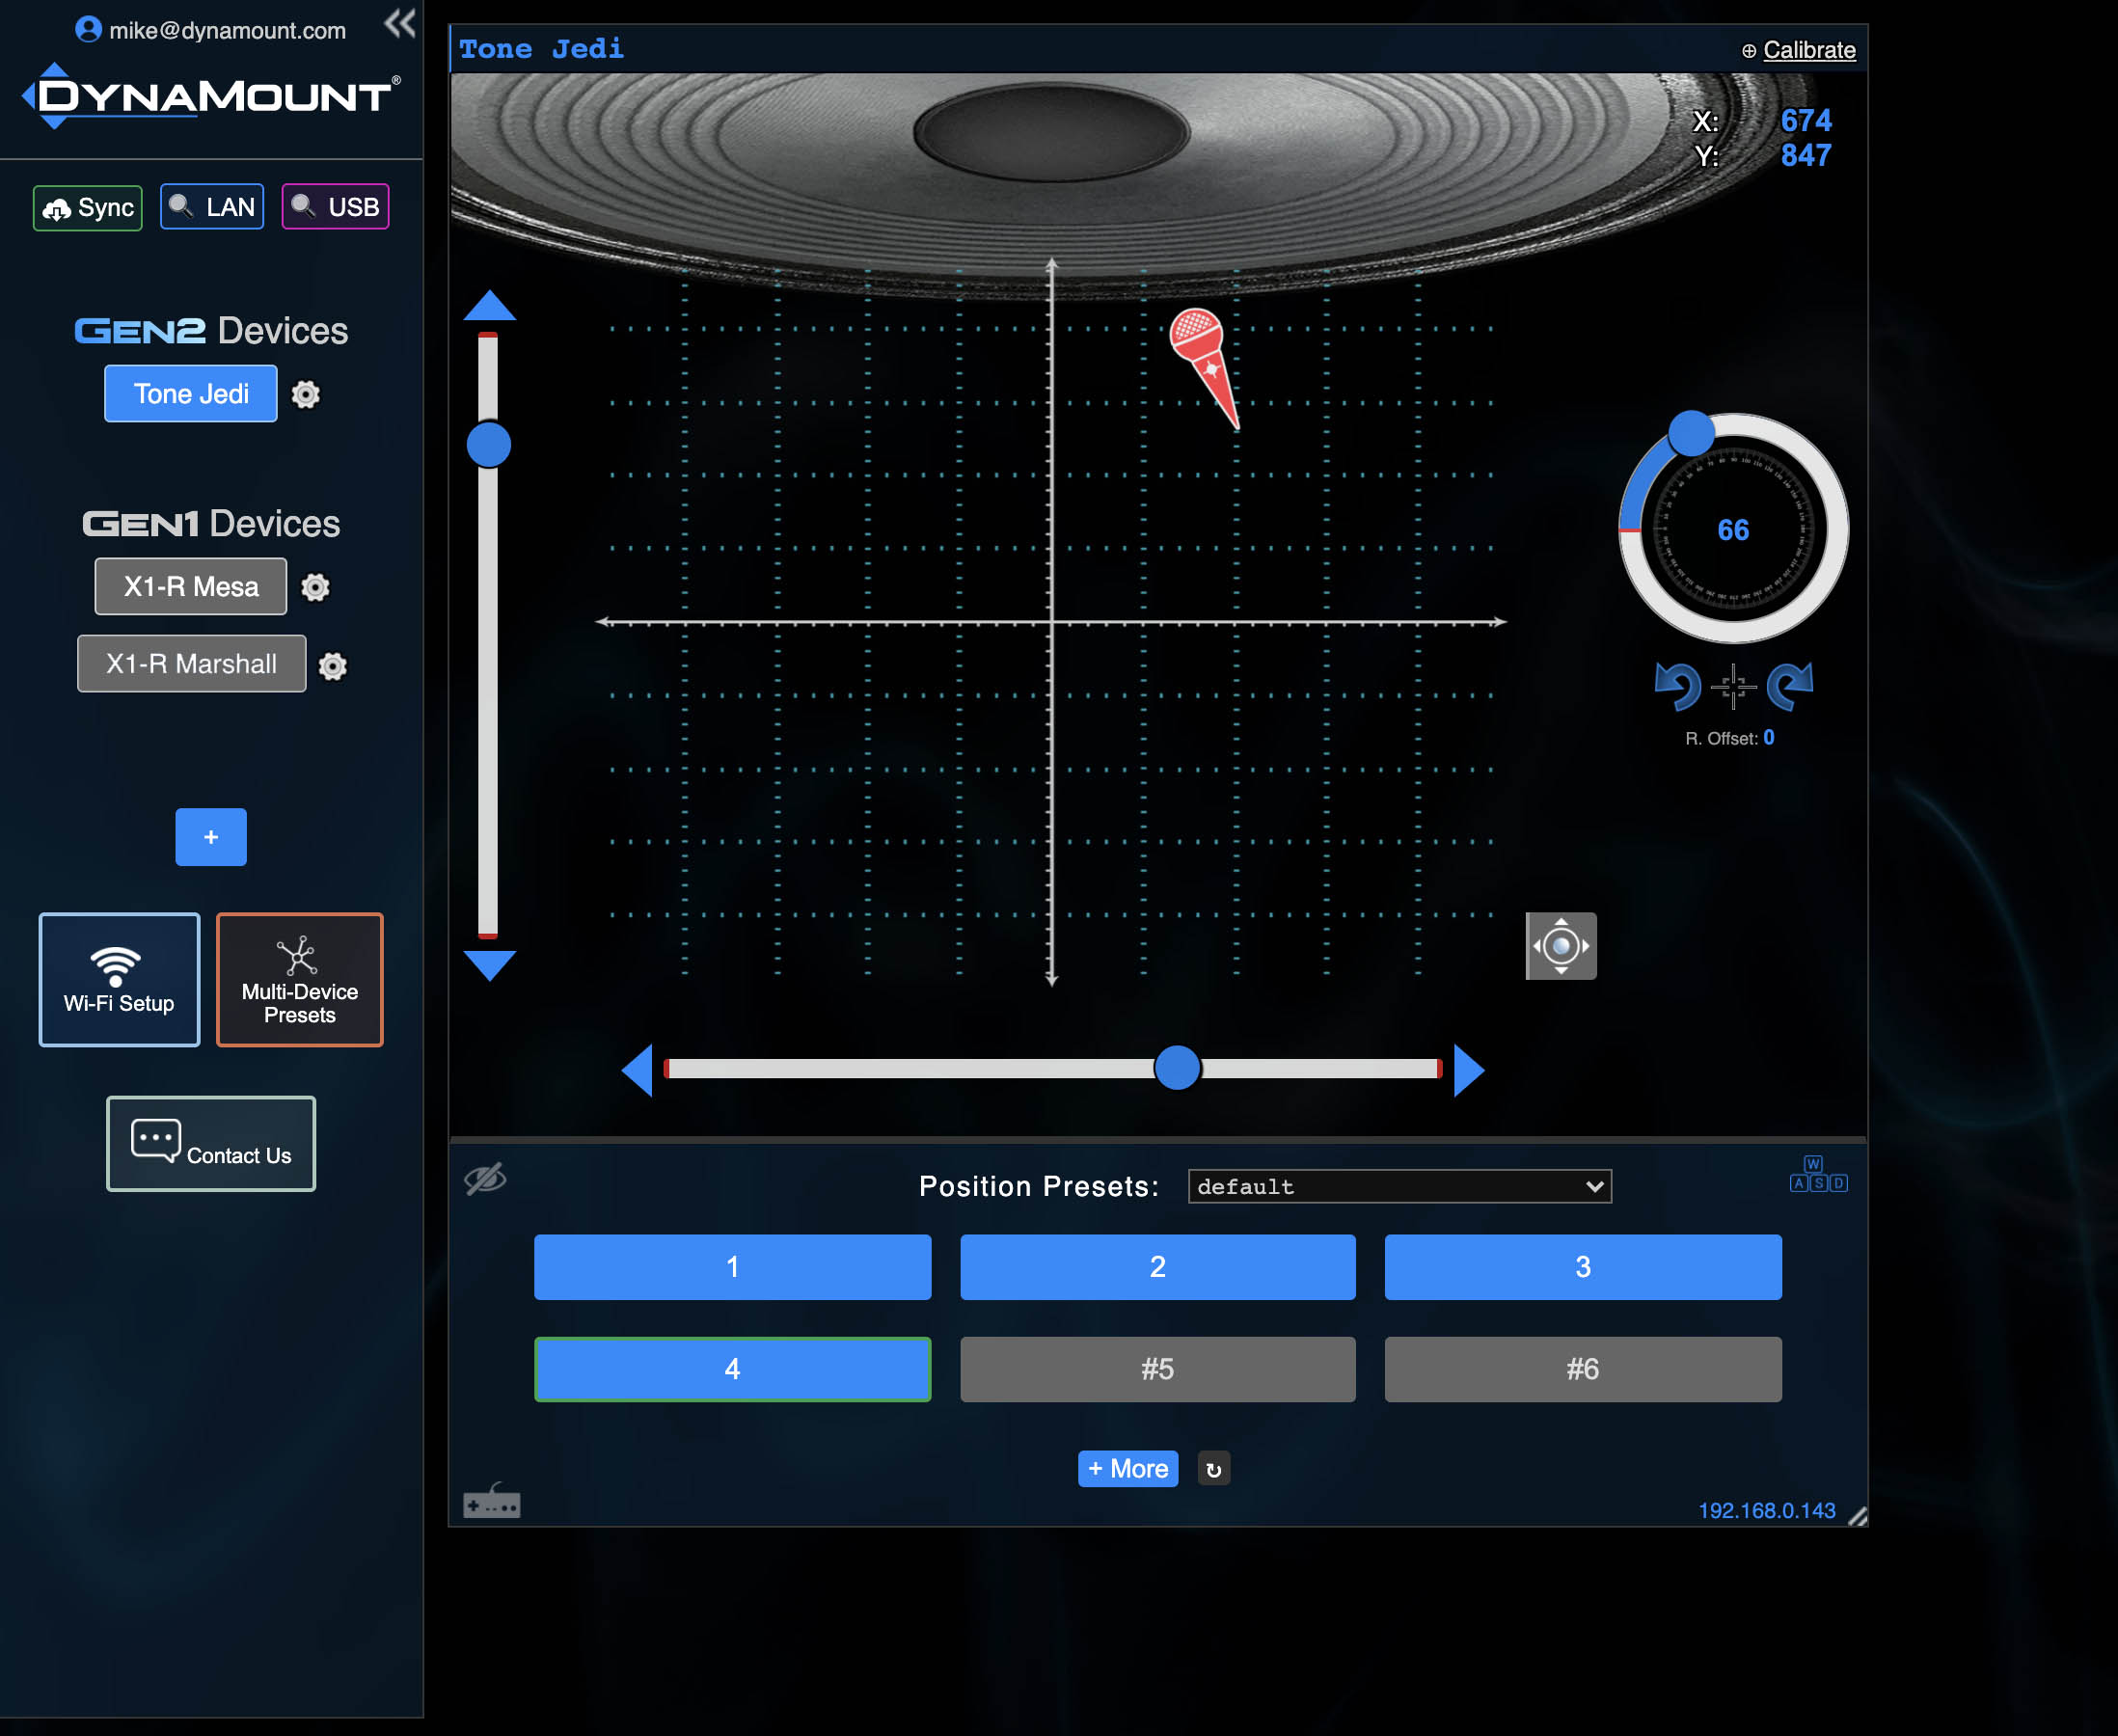
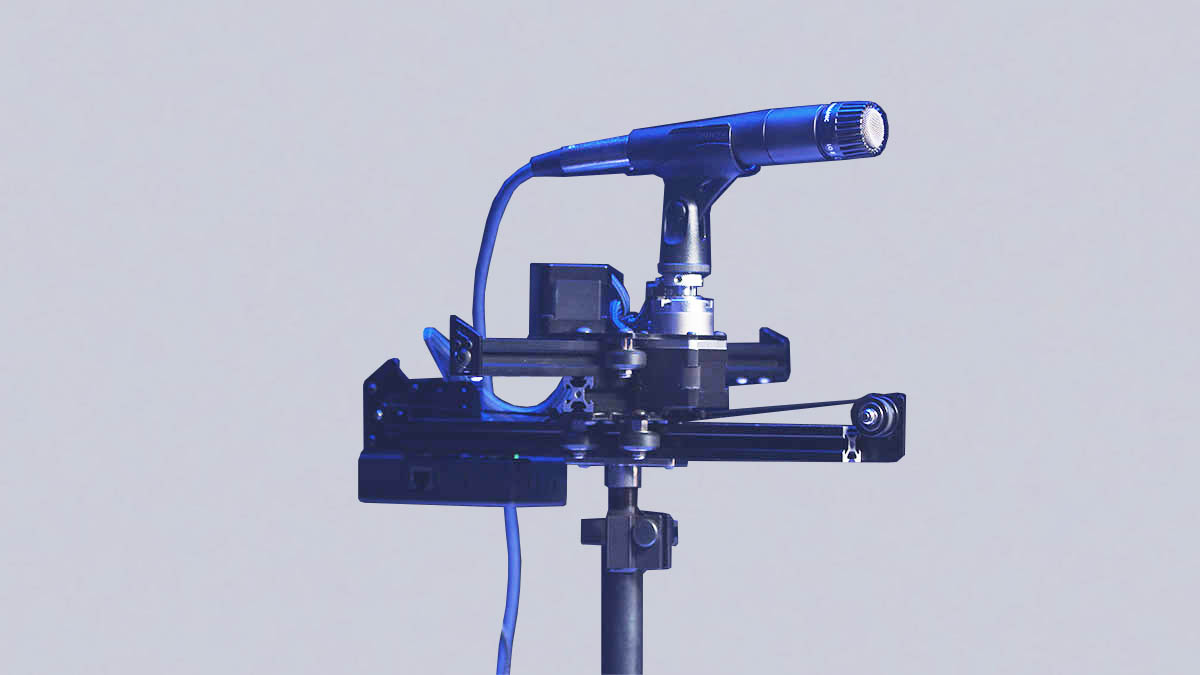
- Now that the unit has calibrated, attach a microphone of your choice and secure it in the desired centered/home rotation position.
- Note! Use the included black “jam nut” to easily lock the mic in the centered/home position manually.
- Alternatively, you can center the mic by rotating it from the app, then select the “⦻” button (directly below the mic rotation gauge) to set the new angle as centered/home.
- Use the included reusable zip tie through the slot in one of the rail end plates, to help with mic cable management.
- Warning! Be sure to leave enough slack on the mic cable to allow for a full 360° rotation.
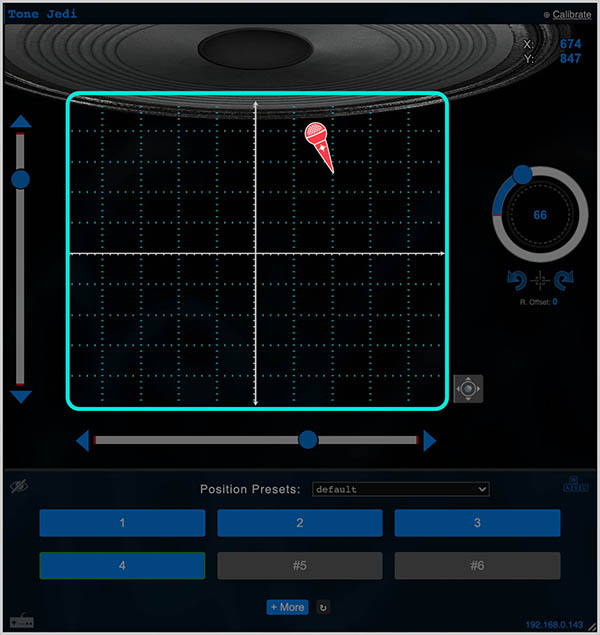
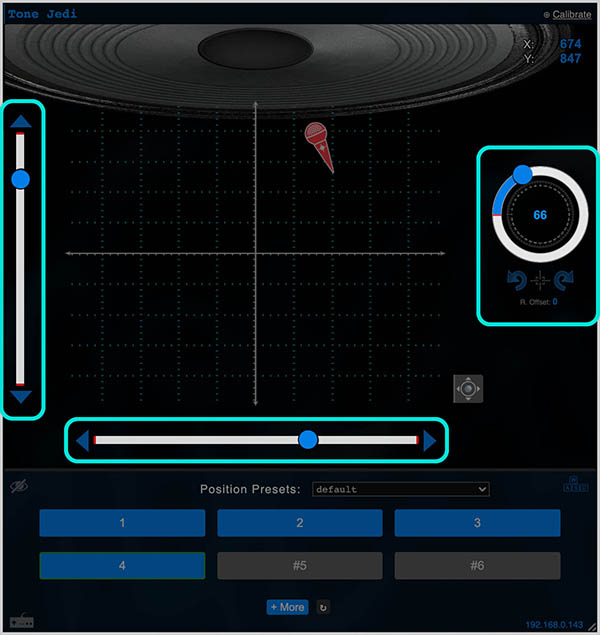
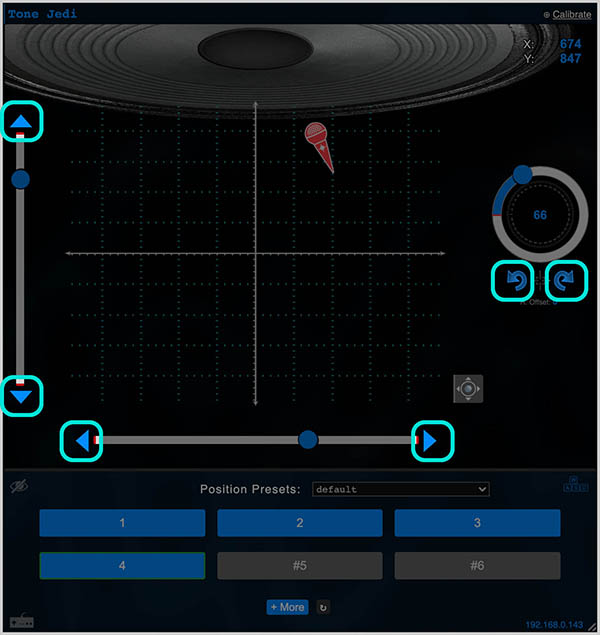
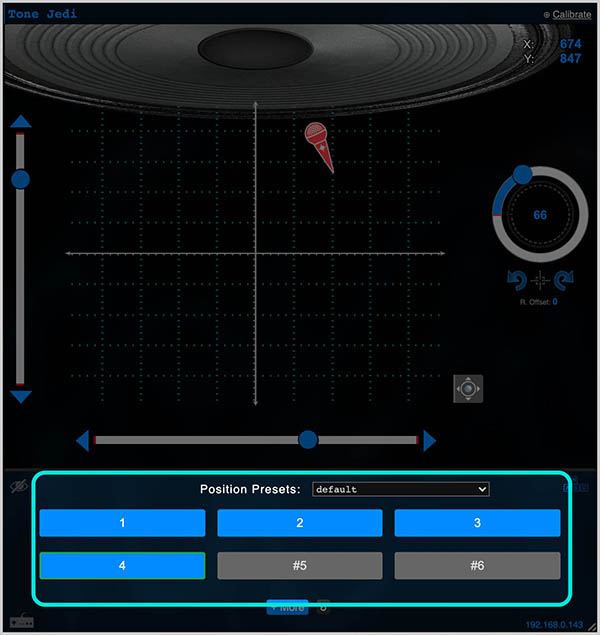
- There are now several ways to manipulate the mic position:
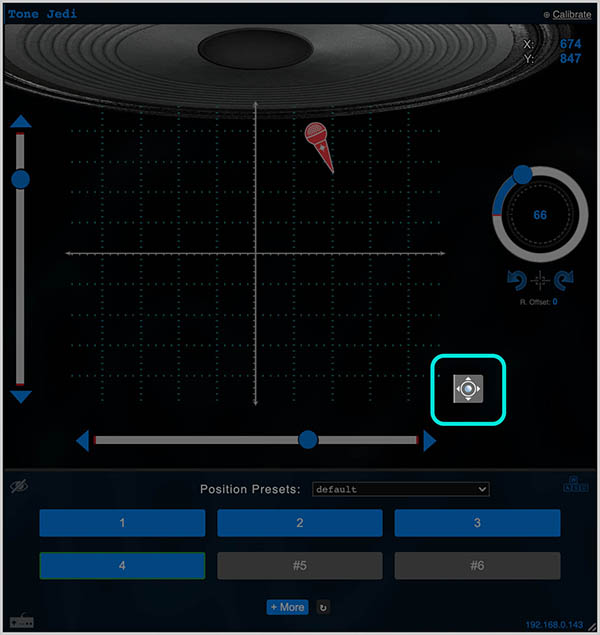
- Virtual Joystick – Click and hold on the ✥ icon in the bottom-right of the control window and a virtual joystick will appear for real-time microphone steering.
- Tip! Adjust the speed by clicking the Device Settings icon, then see “Motion Settings”.
- Tip! If you activate the “Virtual joystick within motion grid” checkbox found in Device Settings > Motion Settings, you can click and hold anywhere in the grid to use the virtual joystick, instead of needing to click on the ✥ icon.
- Click-To-Move – Do a quick click anywhere on the control grid, and the DynaMount will move to that position.
- Sliders – If motion only along one axis at a time is desired, use the control sliders. The DynaMount will move with you as you drag, or you can click a specific spot along the slider.
- Nudge Arrows – For fine tuning the position, click the blue triangular nudge arrows to move in one small increment at a time. The size of each nudge can be adjusted, just click the Device Settings icon, then see “Nudge Arrow Settings”.
- Keyboard Hotkeys – Use the WASD keys on your keyboard for axial motions, along with Q and E for mic rotation.
- TIP! Try using the Q and E rotation hotkeys while using the virtual joystick!
- Type Values Directly – If you know exactly where you want to go, simply type the position value into the corresponding text box, then hit Enter.
- PRESET BUTTONS – Saving the best for last! Once you find a position you like, click on any gray (unsaved) preset button, give it a name, and save it. Now you can precisely return to this position any time you want, simply by clicking the blue (saved) preset button!
- Virtual Joystick – Click and hold on the ✥ icon in the bottom-right of the control window and a virtual joystick will appear for real-time microphone steering.