App Overview

All Gen2 & Gen1 models can be controlled from our free “DynaMount” app available for Mac, PC, iOS, and Android.
While there are a small number of features only available on our laptop/desktop apps (such as flashing Firmware Updates or using USB Joysticks), and likewise there are a small number of features only available on our mobile apps (such as “jedi mode” phone-tilt joystick), overall all versions of the app share a very similar layout and feature set. Your single DynaMount user profile can be used across all app versions.
Below is an app overview along with tips for how to get the most out of your DynaMounts!
Note: For advanced users looking to automate things like IR capture, we offer a private API. Please contact us for details.
User Profile
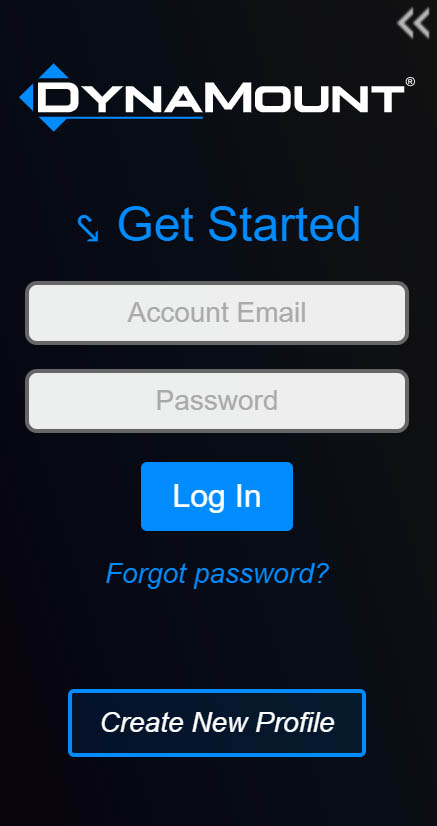
In order to control any DynaMount devices, you must first log in using your DynaMount user profile. You can create a new DynaMount profile from within any one of our apps and this user profile can then be shared across all of our apps. Simply click “Create New Profile” and follow the prompts.
Once you have a user profile, log in using your account email and password to begin controlling your devices.
If you close the app after logging in, the next time the app is opened it will remain automatically logged in until you explicitly log out.
Your Devices
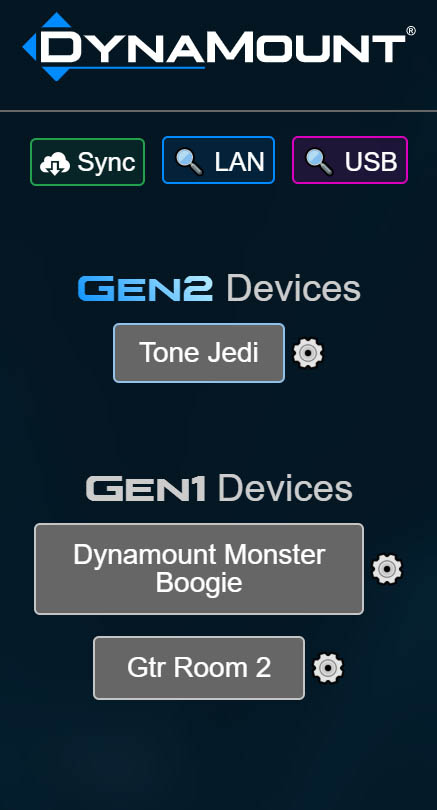
After logging in, the first thing you will see is a list of your DynaMount devices. These are separated into “Gen2 Devices” and “Gen1 Devices”.
From this list, you have the ability to connect with and begin controlling any devices as you choose.
Select the Device Settings (gear icon) button next to each device in order to configure settings such as the device name, motion settings, background settings, and selecting which accessories are currently affixed to the unit.
Adding Devices To Your Profile
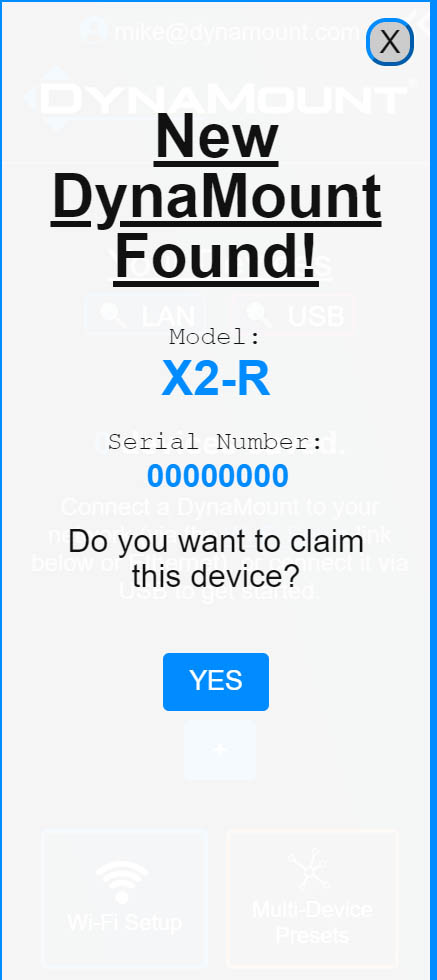
The easiest way to add a new Gen2 DynaMount to your profile is to connect it (via Wi-Fi or Ethernet) to the same network that your computer/phone is on. If the app is open, an alert will pop up as soon as the new DynaMount connects to your network asking if you would like to add it to your profile. If this alert does not show up automatically, please try clicking the “🔍LAN” button to scan the network for DynaMounts.
Connecting To Devices For Control
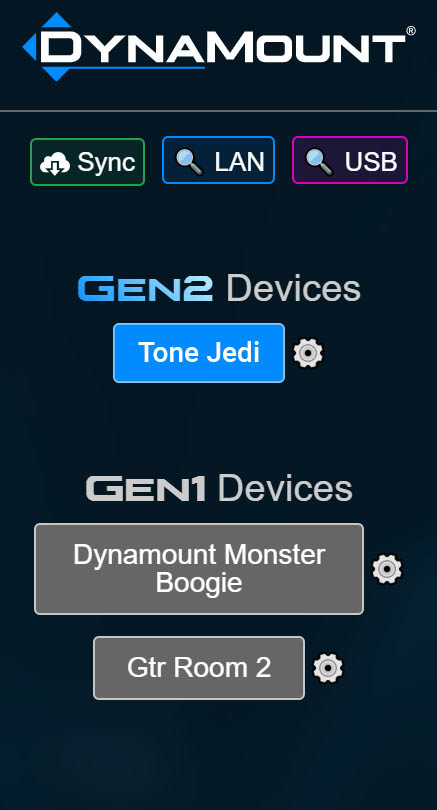
Each device button can be one of three colors representing the device’s current status: blue, magenta, or gray.
- A blue button means this particular DynaMount has been discovered on your local network and is ready to connect with.
- A magenta button means this device has been discovered via USB and is ready to connect with.
- A gray button means the unit has not yet been discovered on the local network or via USB.
If a DynaMount is connected to your local network but its button is still gray, try clicking the “🔍LAN” button to scan the network for devices. If a DynaMount is connected to your computer via USB but its button is still gray, try clicking the “🔍USB” button to scan for USB devices.
Click on a device button to connect with and open a control window for that device. If you click on a gray button, it will first attempt to discover the device on the local network and then will connect with it if found.
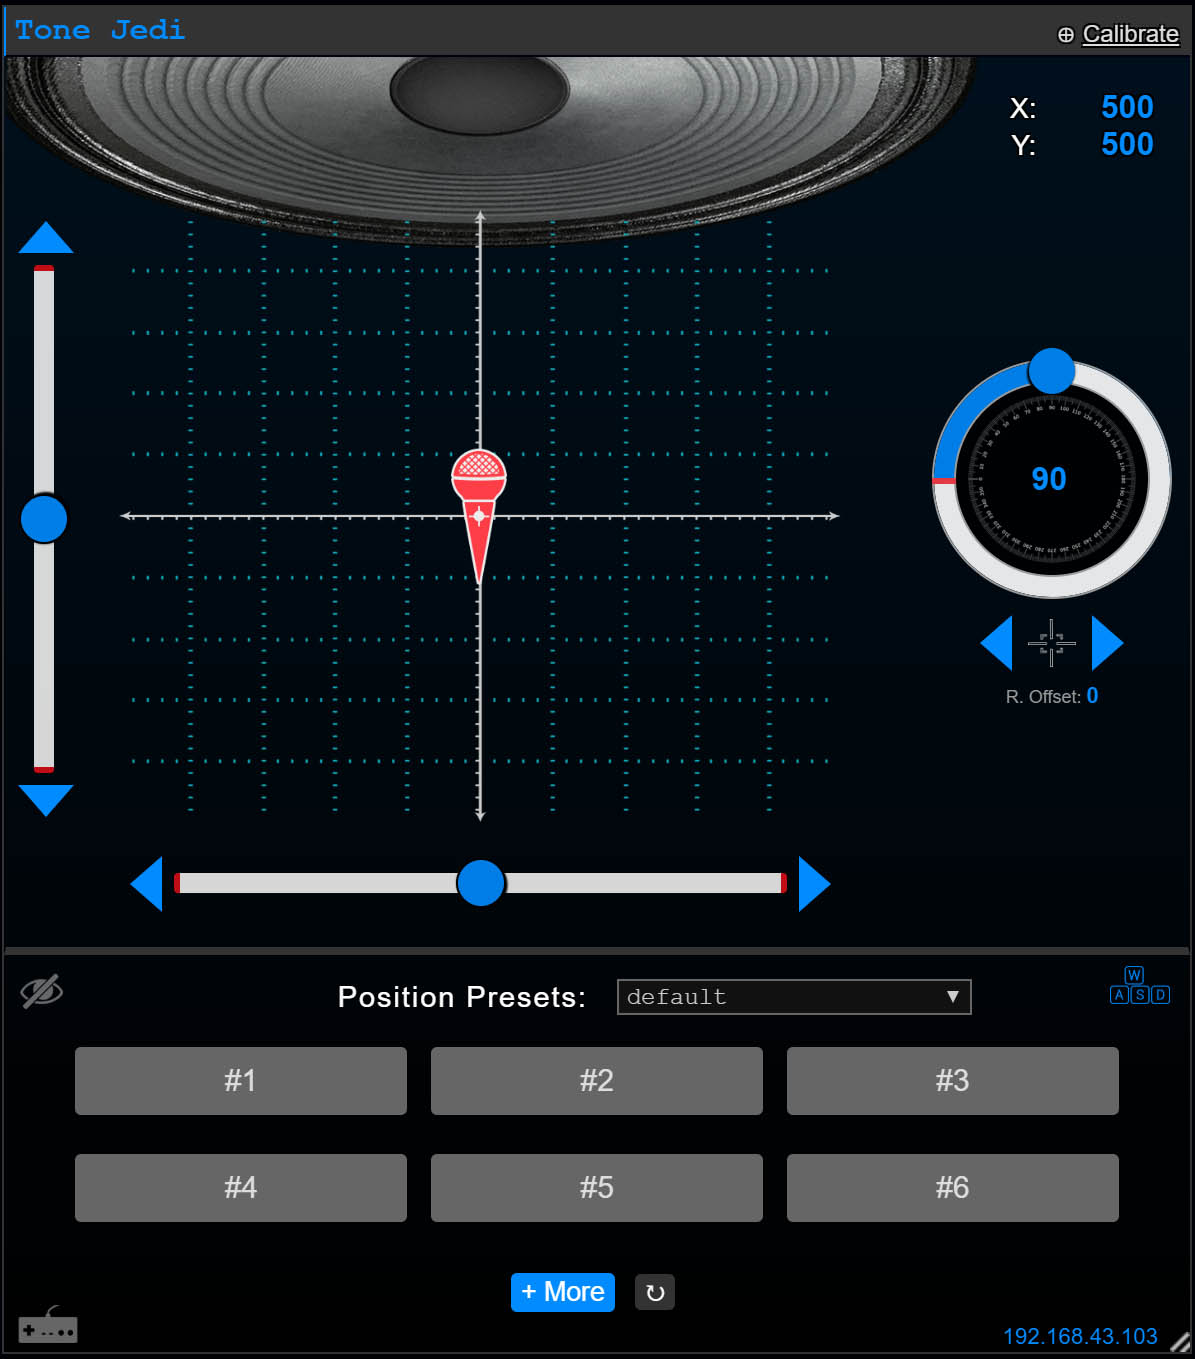
Control Window
Once a device button is clicked and a connection with the DynaMount is established, a control window is opened. It is from here that all of the controls become available to position the unit as desired.
If this is the first time the control window is opened for a DynaMount since that unit was powered up, a calibration prompt will appear before other controls become available.
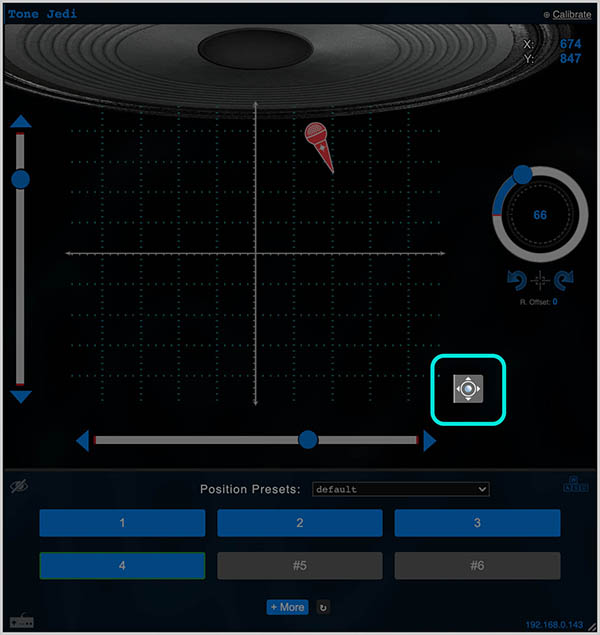
Virtual Joystick (Gen2 only)
Click and hold on the ✥ icon in the bottom-right of the control window and a virtual joystick will appear for real-time microphone steering. Tilt the virtual joystick in any direction to trigger motion in that direction, the farther you tilt the faster the motion will be.
Tip! On laptop/desktop computers you can use the Q and E keys to simultaneously adjust mic rotation while using the virtual joystick.
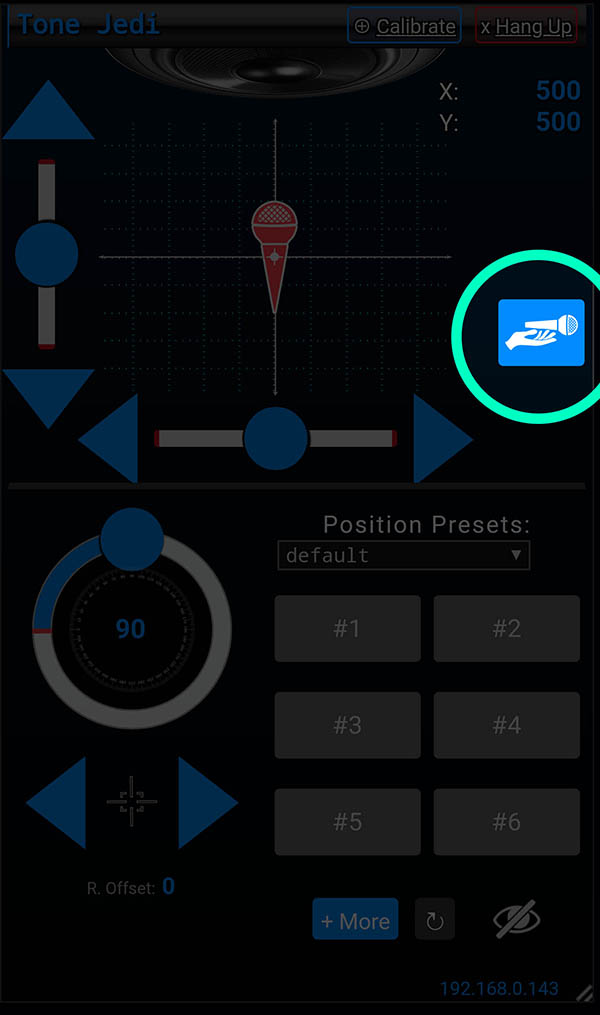
Phone-Tilt Joystick “Jedi Mode” (Gen2, mobile apps only)
If you really want to have the sensation as though the microphone is in your hand while hunting tones, it is now possible with the phone-tilt joystick found in our mobile apps. With this “jedi mode” you simply need to tilt your phone in the desired direction and the unit will begin moving in that direction! It is so easy, you could even close your eyes as you sweep around hunting the sweet spot. Tap the button to enable/disable this mode as desired.
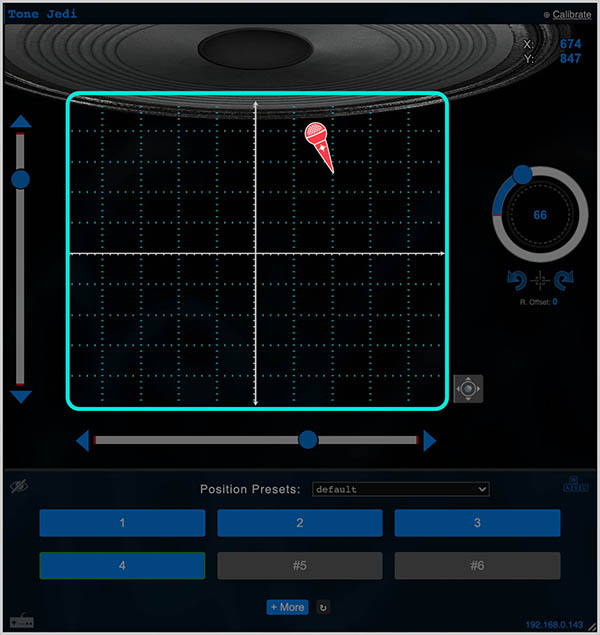
Click-To-Move
Do a quick tap anywhere on the grid and the DynaMount will move to that position.
Tip! Go to Device Settings > Motion Settings to adjust the speed of these motions.
Motion Sliders
If motion along only one axis at a time is desired, you can use the sliders.
Click and drag the handle for each slider and the DynaMount will move along with you.
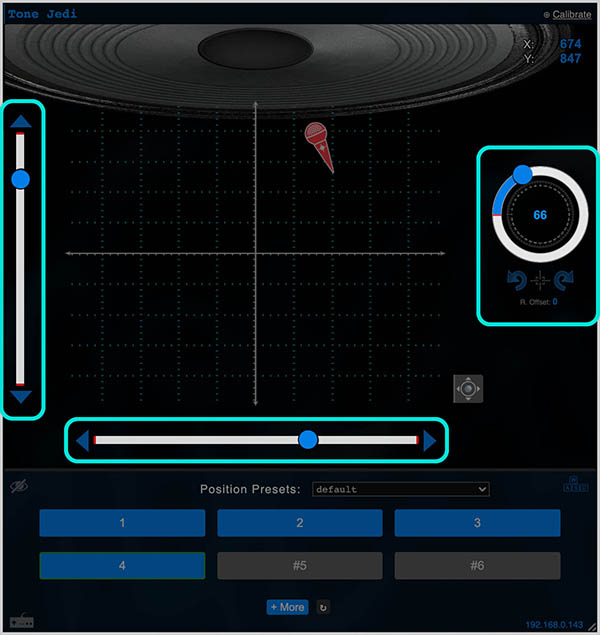
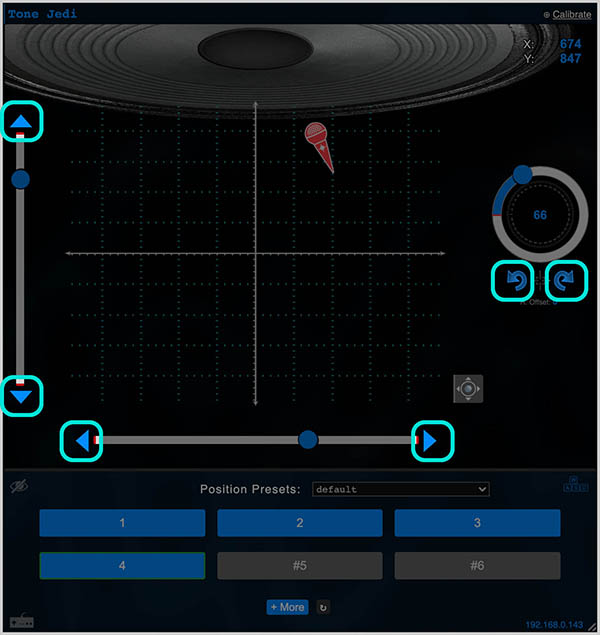
Nudge Arrows
For fine-tuning the position, the Nudge Arrows are a great option. Tap an arrow to move in one small increment at a time in that direction.
Tip! Go to Device Settings > Nudge Arrow Settings to set how far the unit should move with each tap.
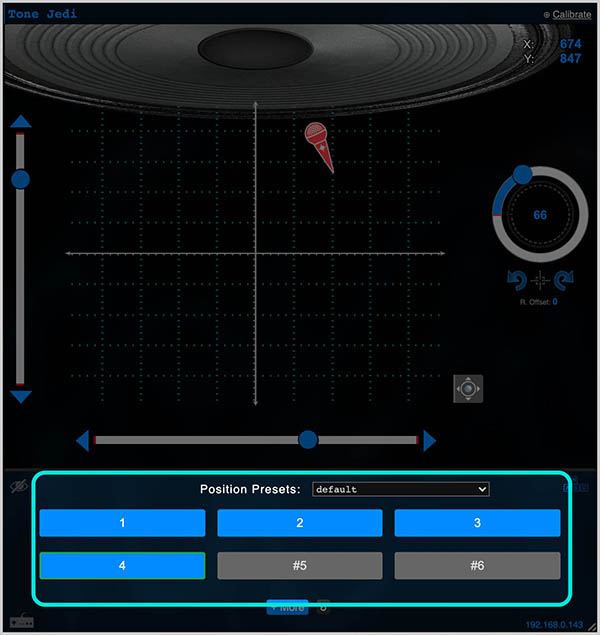
Preset Buttons
Once you find a position you want to save for later recall, simply do a quick tap on any gray preset button. A prompt will appear where you can assign a name to the preset, along with the speed the device should use each time it moves to this preset.
A preset button will turn blue once a position is assigned to it. A quick tap on a blue preset button will move the DynaMount to that saved position.
A slight green outline will appear on a preset button if the DynaMount is positioned at the precise location assigned to that preset button.
Tip! Click the “+More” button, or create another preset Session, to add more presets.
To delete a preset, click and hold on any blue preset button.
“Blind” Mode
If you have two or more position presets stored for a device and would like to do an unbiased A/B comparison between them (to find a favorite), click the “👁” icon to enter Blind Mode.
First, it will ask you to select which saved presets for this device to include in the comparison. These will then be randomly shuffled and given a plain name “1”, “2”, etc. so it’s not clear which is which. You can then tap each of the shuffled presets triggering the DynaMount to move to that position (but nowhere on the screen is this position revealed). This allows you to use only your ears and select the position that sounds best without knowing where the mic is physically located, no bias from thoughts of where the mic “should” be placed. Once a favorite position is determined, click “Reveal” to see which preset this actually was.
Multi-Device Presets
If you own multiple DynaMounts and would like to have more than one unit recall positions at the push of a single button, use the “Multi-Device Presets” (MDP) feature. This way, when you find desired tones by blending multiple microphones, you can store the respective positions of each mic all together into a single MDP.
You will first create and name a Group containing two or more DynaMounts of your choosing. Groups may contain up to 10 DynaMounts.
Then, once each DynaMount in this Group is positioned at the desired location, select “+ New Multi-Device Preset” and give this MDP a name. Now, whenever you click this saved MDP, all devices in the Group will move to their respective positions!
Tip! A Group can contain any combination of Gen2 and Gen1 units.